First, select project: case for craft tools, perhaps? Consider design of perfect [insert project here]. Adjust specifications regularly to ensure perfect combination of variables is not overlooked.
After some months or years, find project has not eventuated. Success!
Important discovery for humankind! Net result of perfectionism appears to be nil – but further research clearly indicated.
Design perfect crochet-hook case, planning for capacity greatly exceeding likely lifetime quantity of crochet hooks. Agonize for extended period over choice of perfect fabric. Inky stretch velvet (aka Fabric of Unalterable Doom) cannot be passed by. Disregard lack of overlocker or even machine with zigzag stitch.
Holes in your pockets. The very image of lack and loss. But do not despair – the garment and its pockets can be saved. All you need are pins, needle, thread, a bit of fabric and the will to make a difference.
If you’re anything like me, the invalided garment sits in a heap in the mending pile until you either grit your teeth and get on to the job of mending it, or decide you don’t need it that badly after all and out it goes.
Signs You Have Left Your Mending Too Long #14: Ferret Infestation
And so it was with my husband’s trousers (except without ferrets). Before anyone objects to me mending my husband’s clothes for him, let me point out that he does my techie ‘mending’ for me. From each according to their ability; to each according to their need, as the apostle Paul said, though admittedly, not in those words.
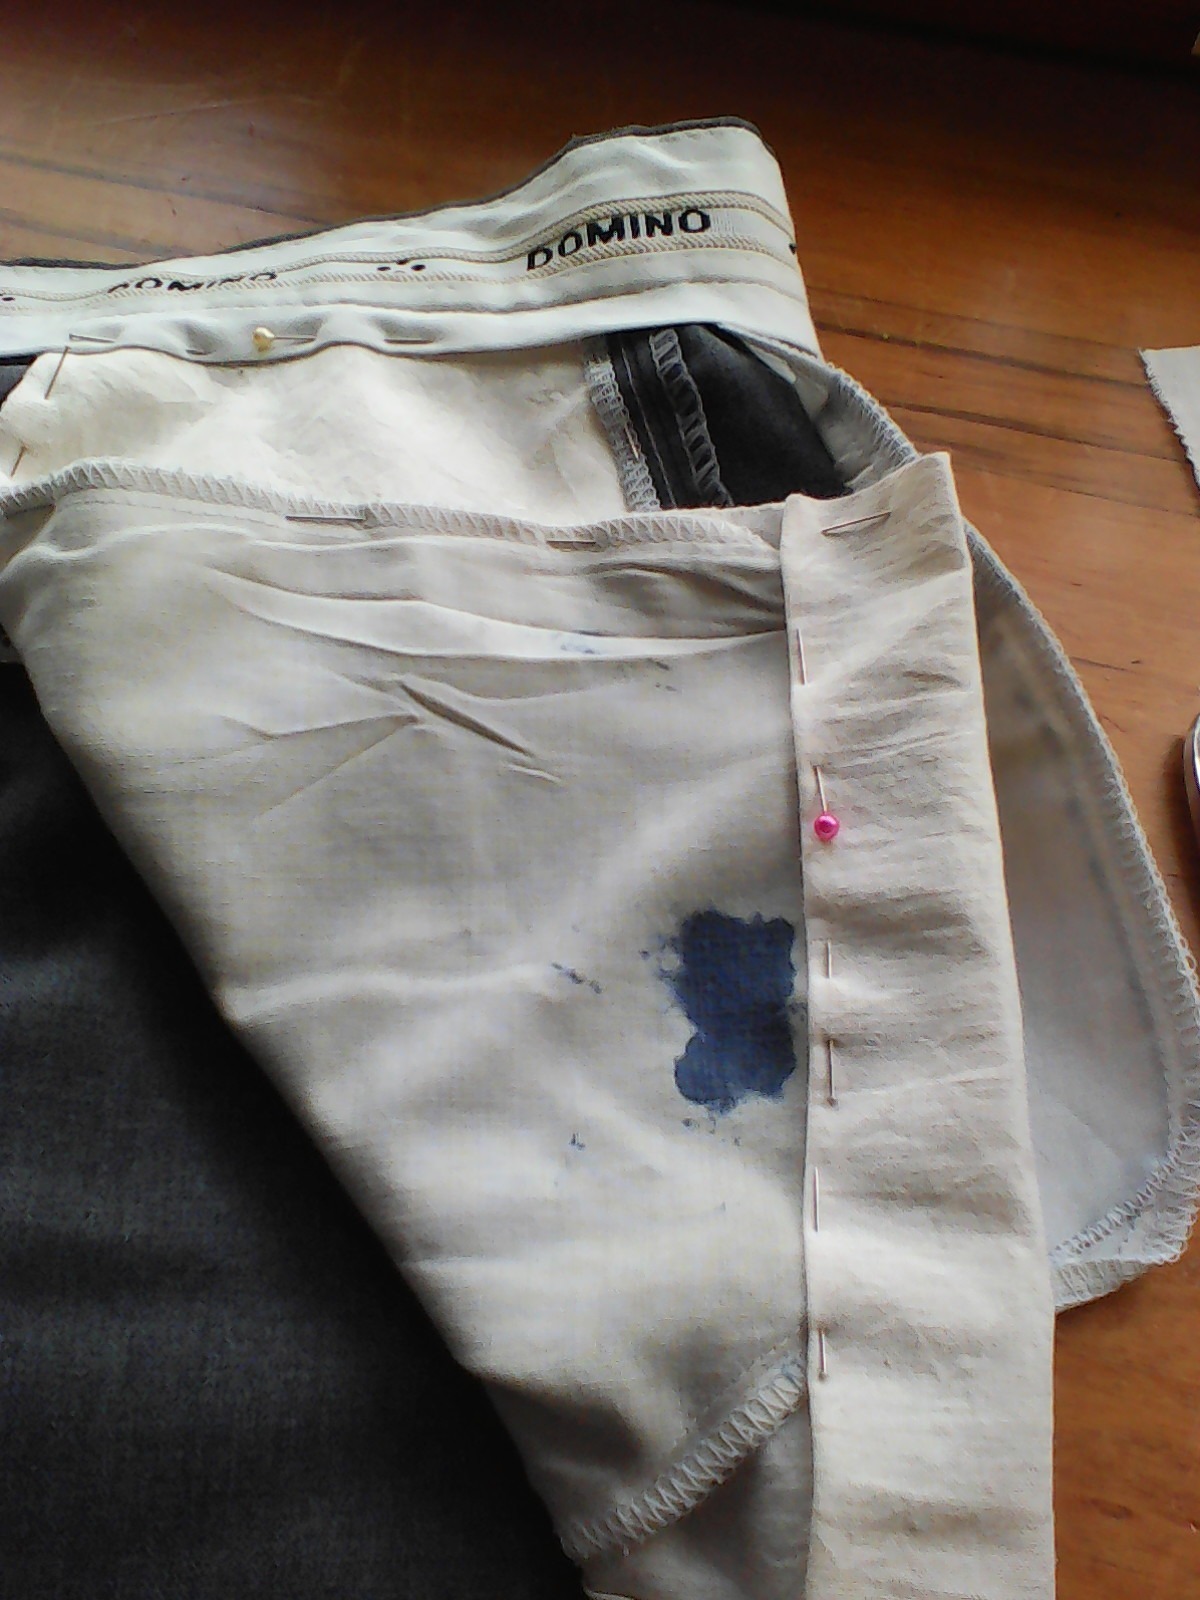
The problem wasn’t so much finding the time or motivation to mend them, as finding the know-how. Because the problem was one I’d never tackled before. I knew I could put a patch on a patch pocket, but this is the other kind: set-in. Further complicated by discovering that the whole side of the pocket was so worn you could read through it.
Highlighting of hole provided by The Leaky Pen of Yesteryear. And how come we have yesteryear and yesterday but not yestermonth or yesterweek?
Would I need to replace a whole pocket? Did I know how? (Clearly, no.) But that didn’t stop me. The first thing I did was to wash and iron a long thinnish piece of calico (or muslin, depending on where you come from). That was it for a month or so while my eyes recovered.
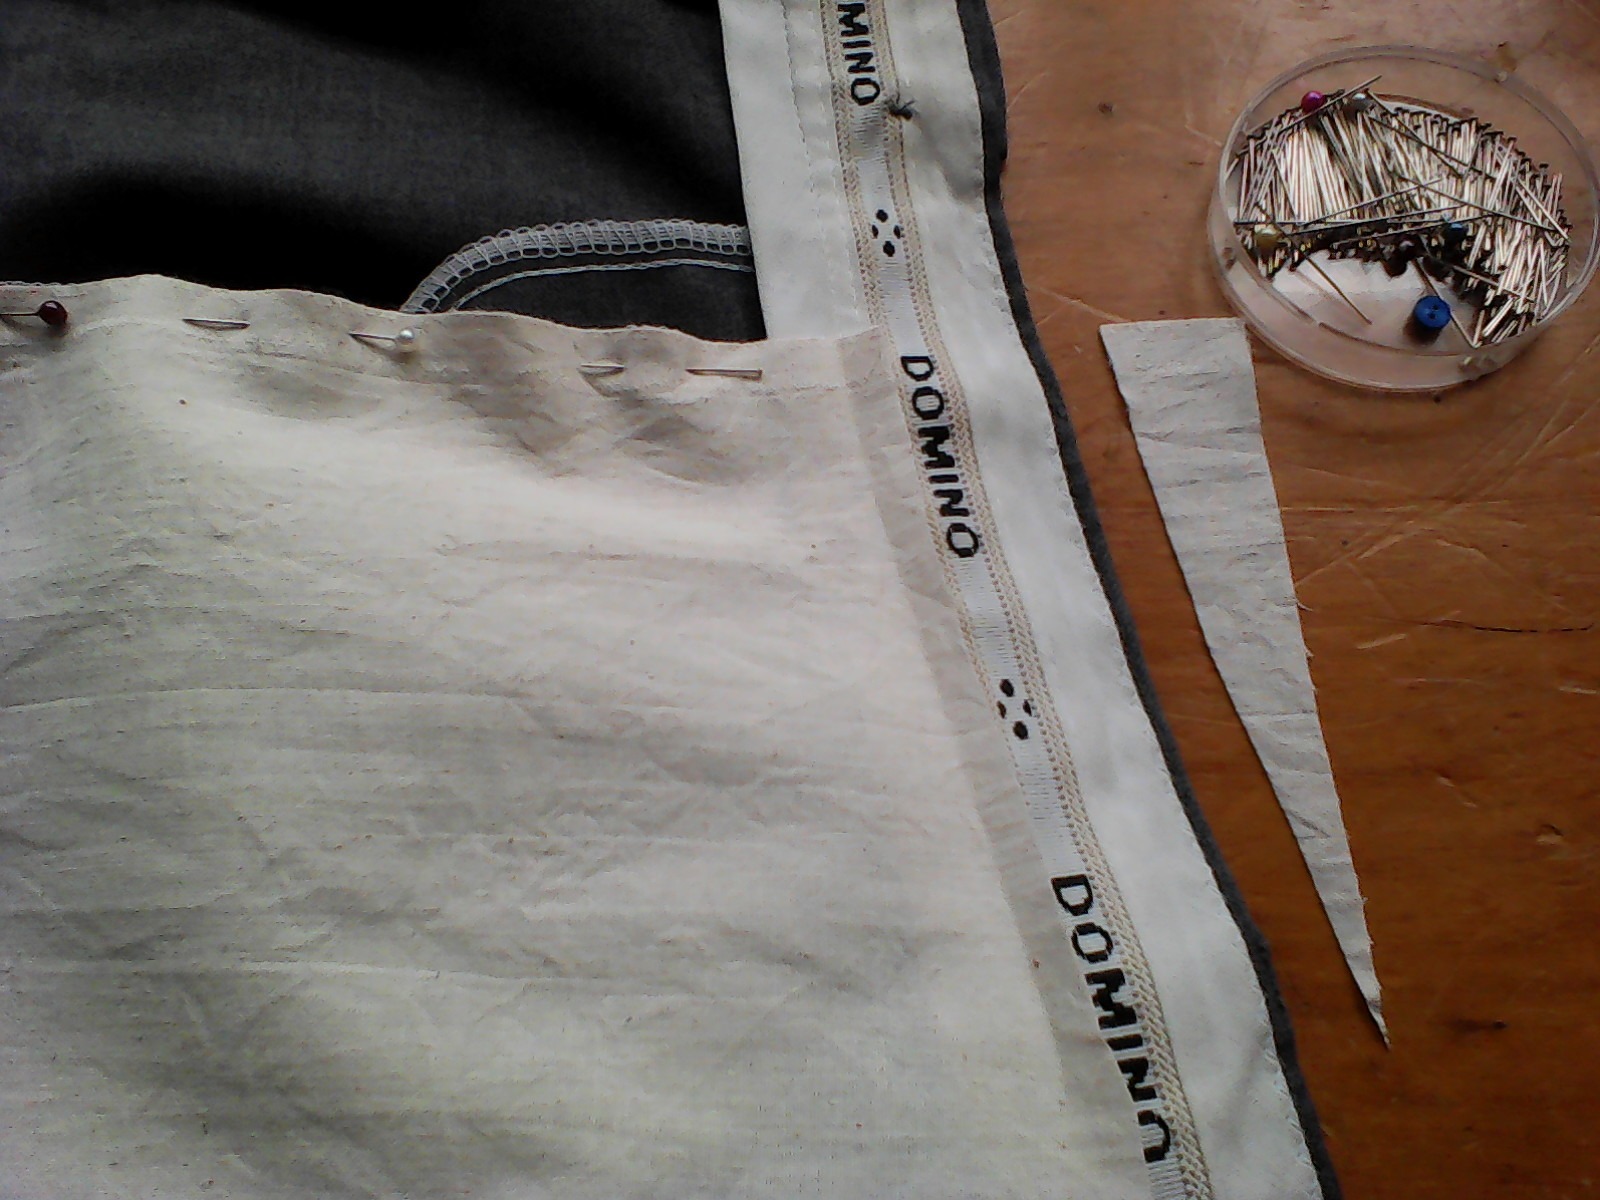
The next step was to lay the calico (as I shall call it) over the worn side of the pocket and pin along the only straight line the pocket had. I used the selvedge (or selvage) for this. Some people say you should never use the selvedge for anything, but clearly, I am not one of them.
Then it was a matter of pinning, trimming, and pinning some more. Handy hint: if you’re going to tuck an edge under a pre-existing overhang, you can push the whole cloth under and then press down. Pull the fabric out and it’s got a crease showing you where the fold will be. Cut the excess off, a short distance from the fold, and Bob’s your uncle. Example:
In this case, the folded hem will fit under the waistband (the bit marked Domino). Don’t forget to fold the fold the other way to pin in place – raw edge underneath.
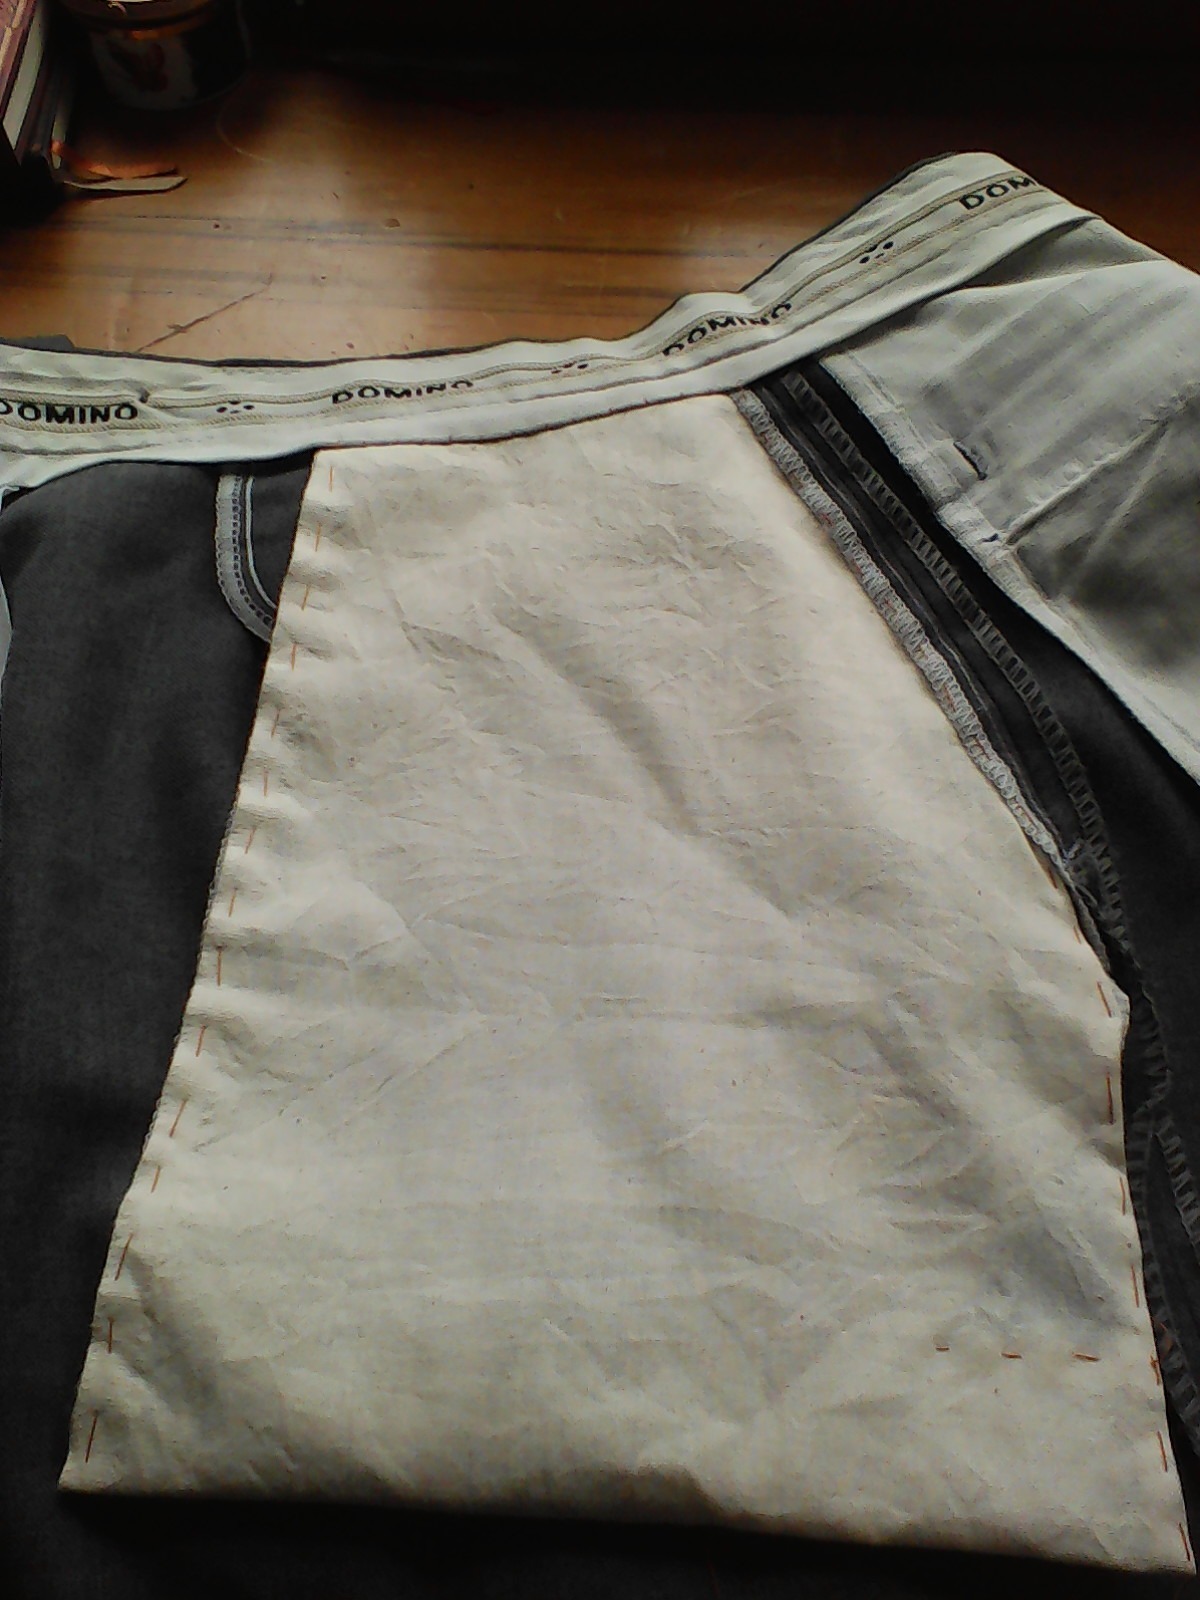
Carry on trimming and pinning, until the fabric is fitted all the way around.
To make my life that much easier, instead of shaping the calico to the curve of the pocket at the bottom, I simply pinned a hem and folded it over to the back of the pocket. Like this. (Clicking may result in a bigger image.)
Then I tacked it. Tacking is one of those things, like flossing your teeth and knitting a gauge swatch, that you know you ought to do, but frequently don’t. Maybe it’s my age beginning to show, but I find I am now doing all of those things. I don’t say I necessarily enjoy them, but I enjoy not having the after-effects of not doing them: wiggly seams, dentist’s drills, and outsize socks.
The other important thing to remember is that you shouldn’t tack through too many layers. If you can’t get your hand into the pocket, you’ve gone too far. The same goes for the fold-up seam at the bottom, unless you want a squared-off pocket.
The other good thing about tacking (besides the stability it gives when doing the actual sewing) is that you can have a try-on without the victim wearer having to do the Dance of Extreme Delicacy as pin-points menace their recoiling flesh. This is a chance to make sure that there are no uncomfortable bumps, chafing spots etc; and that the pocket hangs properly.
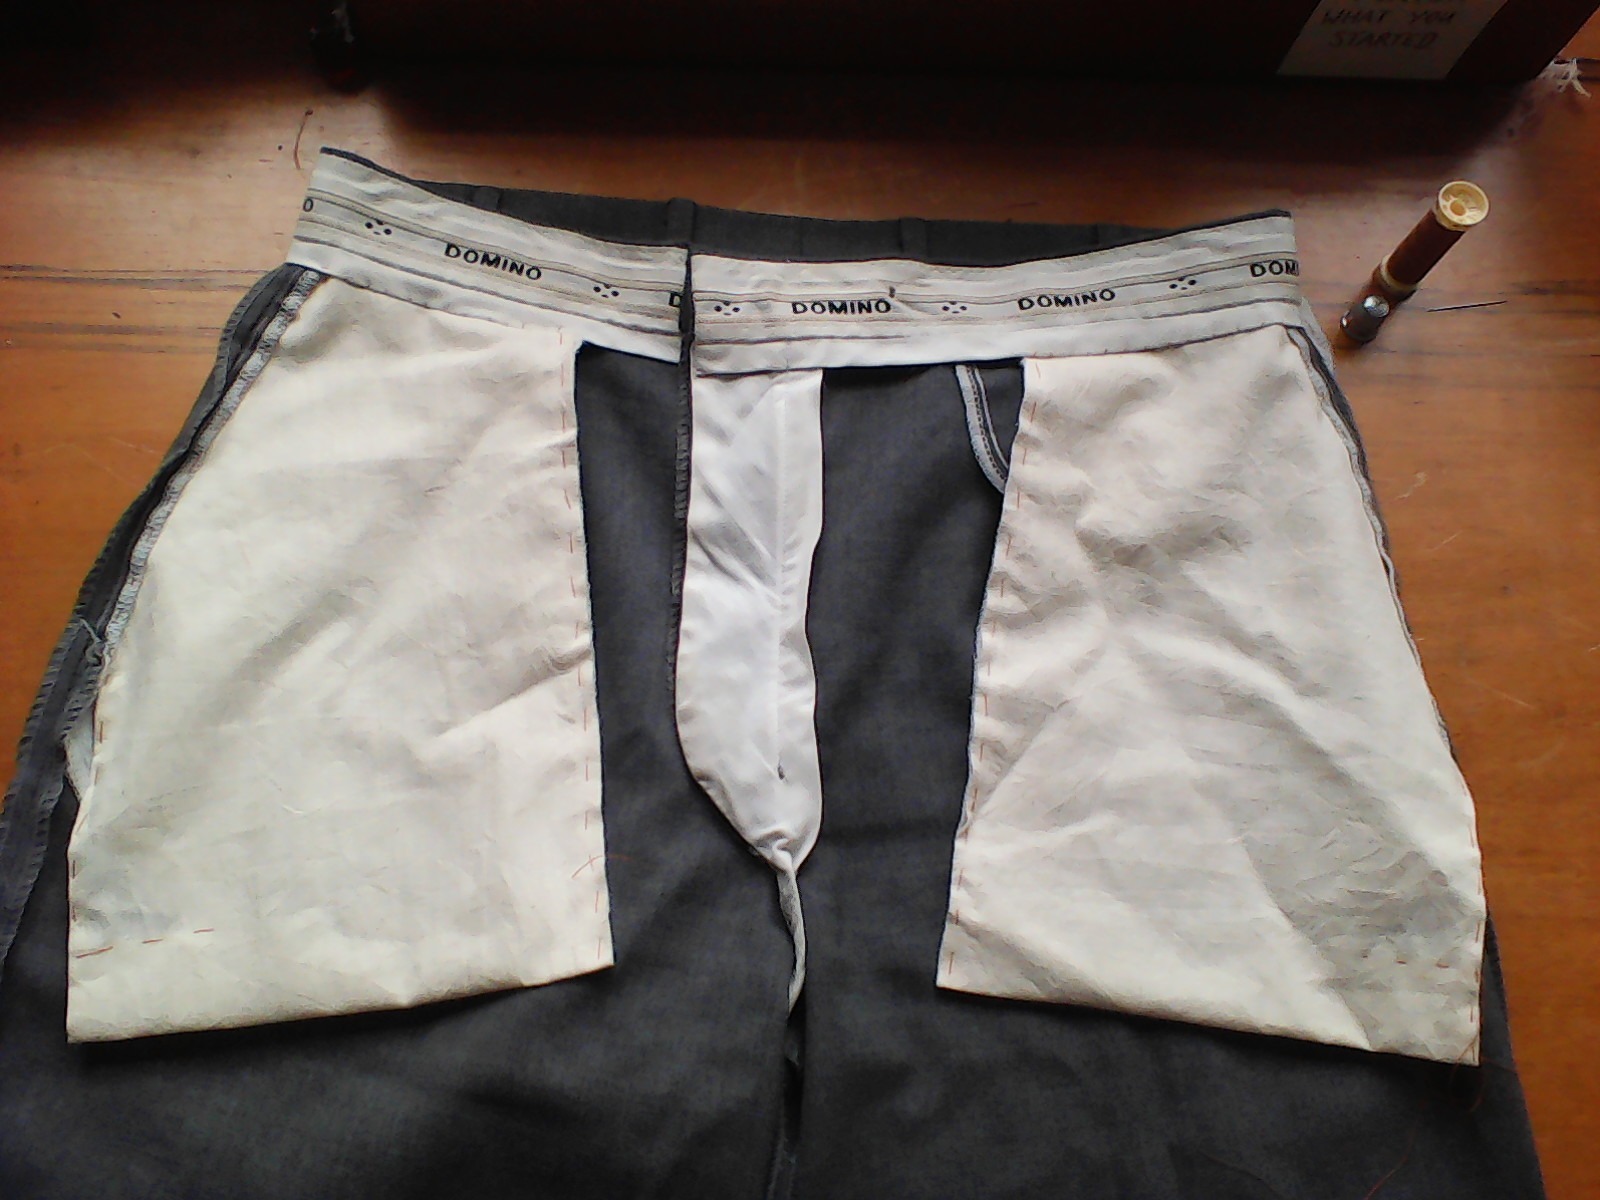
Then you retrieve the garment, and (at least if you are me) repeat the procedure from the top for the other pocket.
Once it’s all placed, pinned, tacked and tried, you are ready to sew. I sewed by hand, because there are some things that are fiddlier by machine than hand, and sewing through only some of the layers is one of those things. It didn’t take very long, to my surprise.
Once you’ve sewn everywhere that was tacked, you can take out the tacking. Finished? No, not quite. You still have a hole on the inside of your pocket, and unless you want to deal with the anguish of trying to extract something from between the original pocket and the new layer, you had better take the final step.
Simply sew an outline of running stitch around each hole, fastening it to the new layer. (But not all layers, unless you want a donut pocket.) As thus:
Well done! You have rescued a garment from the looming shadow of the rubbish dump and restored it to useful life. And that is what I call practical ethics.
The seed of the idea was planted in my head by this post and its comments. Several weeks and sleepless hours later, the thought takes form – and photographs (click to enlarge).
But do I need a stuffed Jabberwocky head in my life? I hear you ask. A beheaded (or rather dis-embodied) Jabberwocky is a symbol of triumph over oppression, whether in your past or your future. You should have one by you at all times.
Furthermore, when completed, this piece of ‘wocksidermy has stress-relieving properties. Read on for details…
Don’t worry if your sewing skills are not of the finest – that is no impediment to successful Jabberwock creation. They are known to be ugly beasts, and having your head chopped off does nothing for the looks.
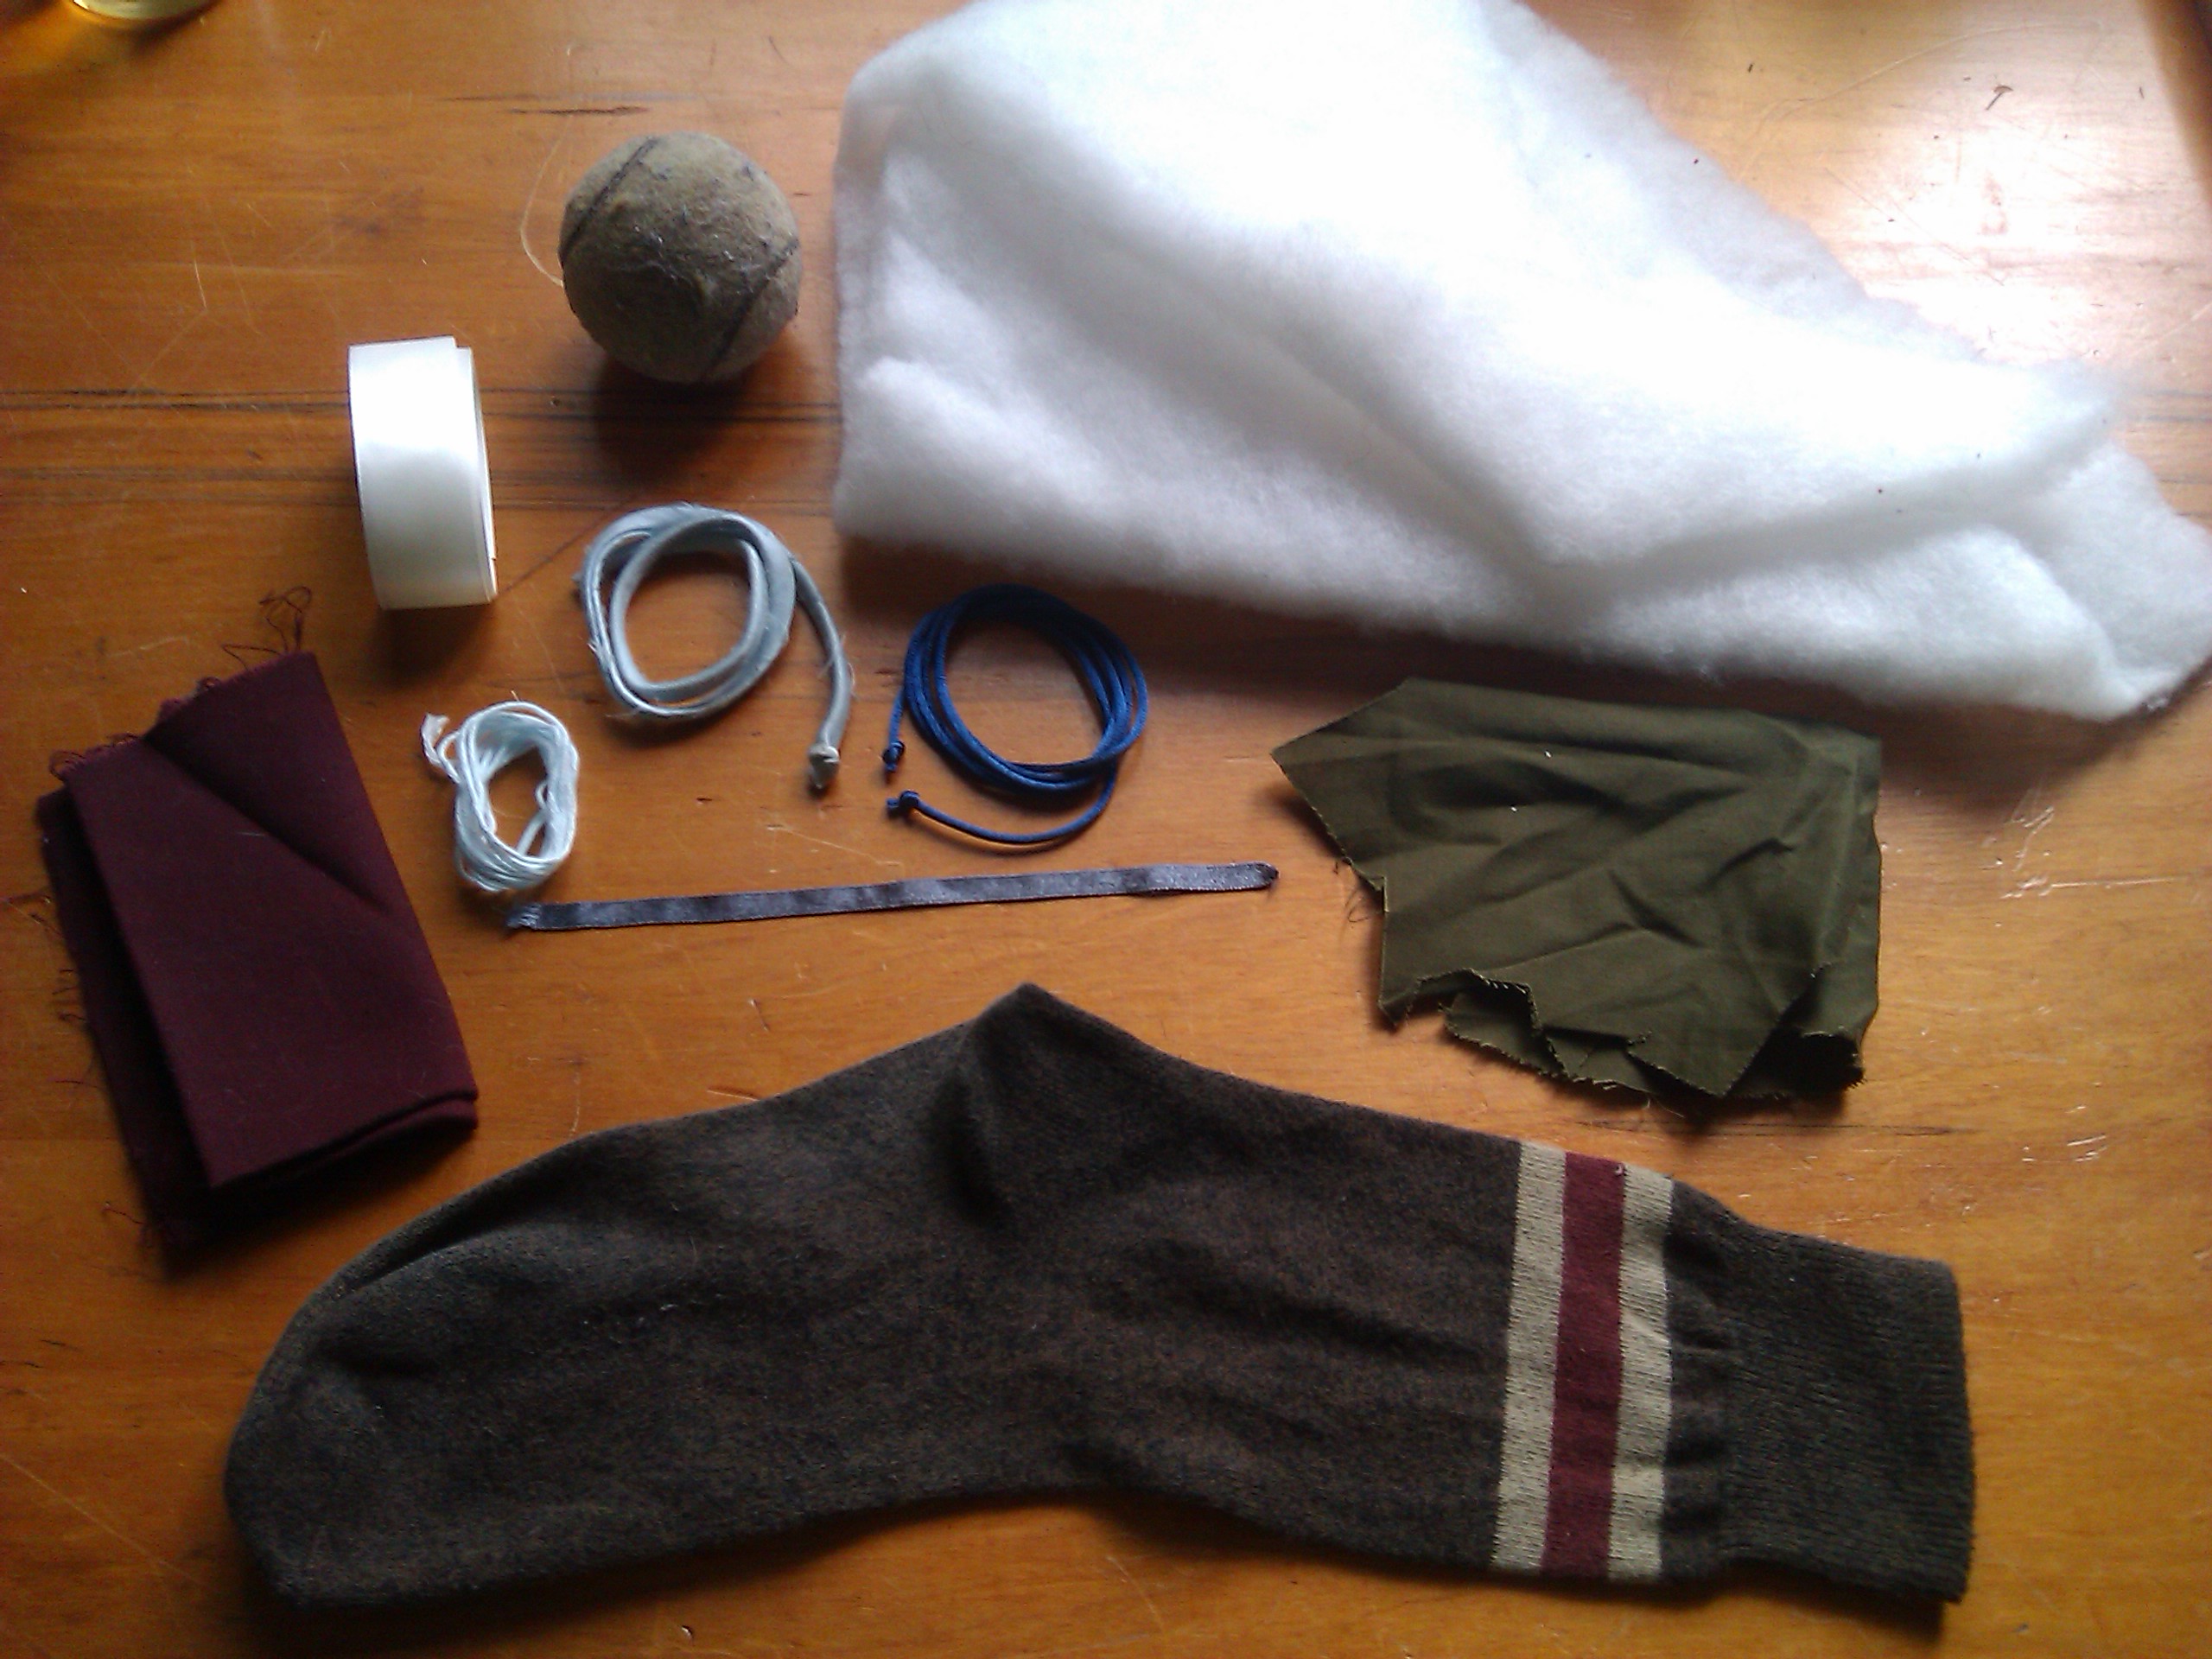
The Materials
a sock (as ugly as possible)
fabric (I used wine-red and olive)
ribbons (I used white, green & grey and grey-green bias binding)
a tennis ball (optional, but much more satisfying)
stuffing (I used old quilt batting)
thread (I used brown, green and orange)
scissors
needle & pins
The Body
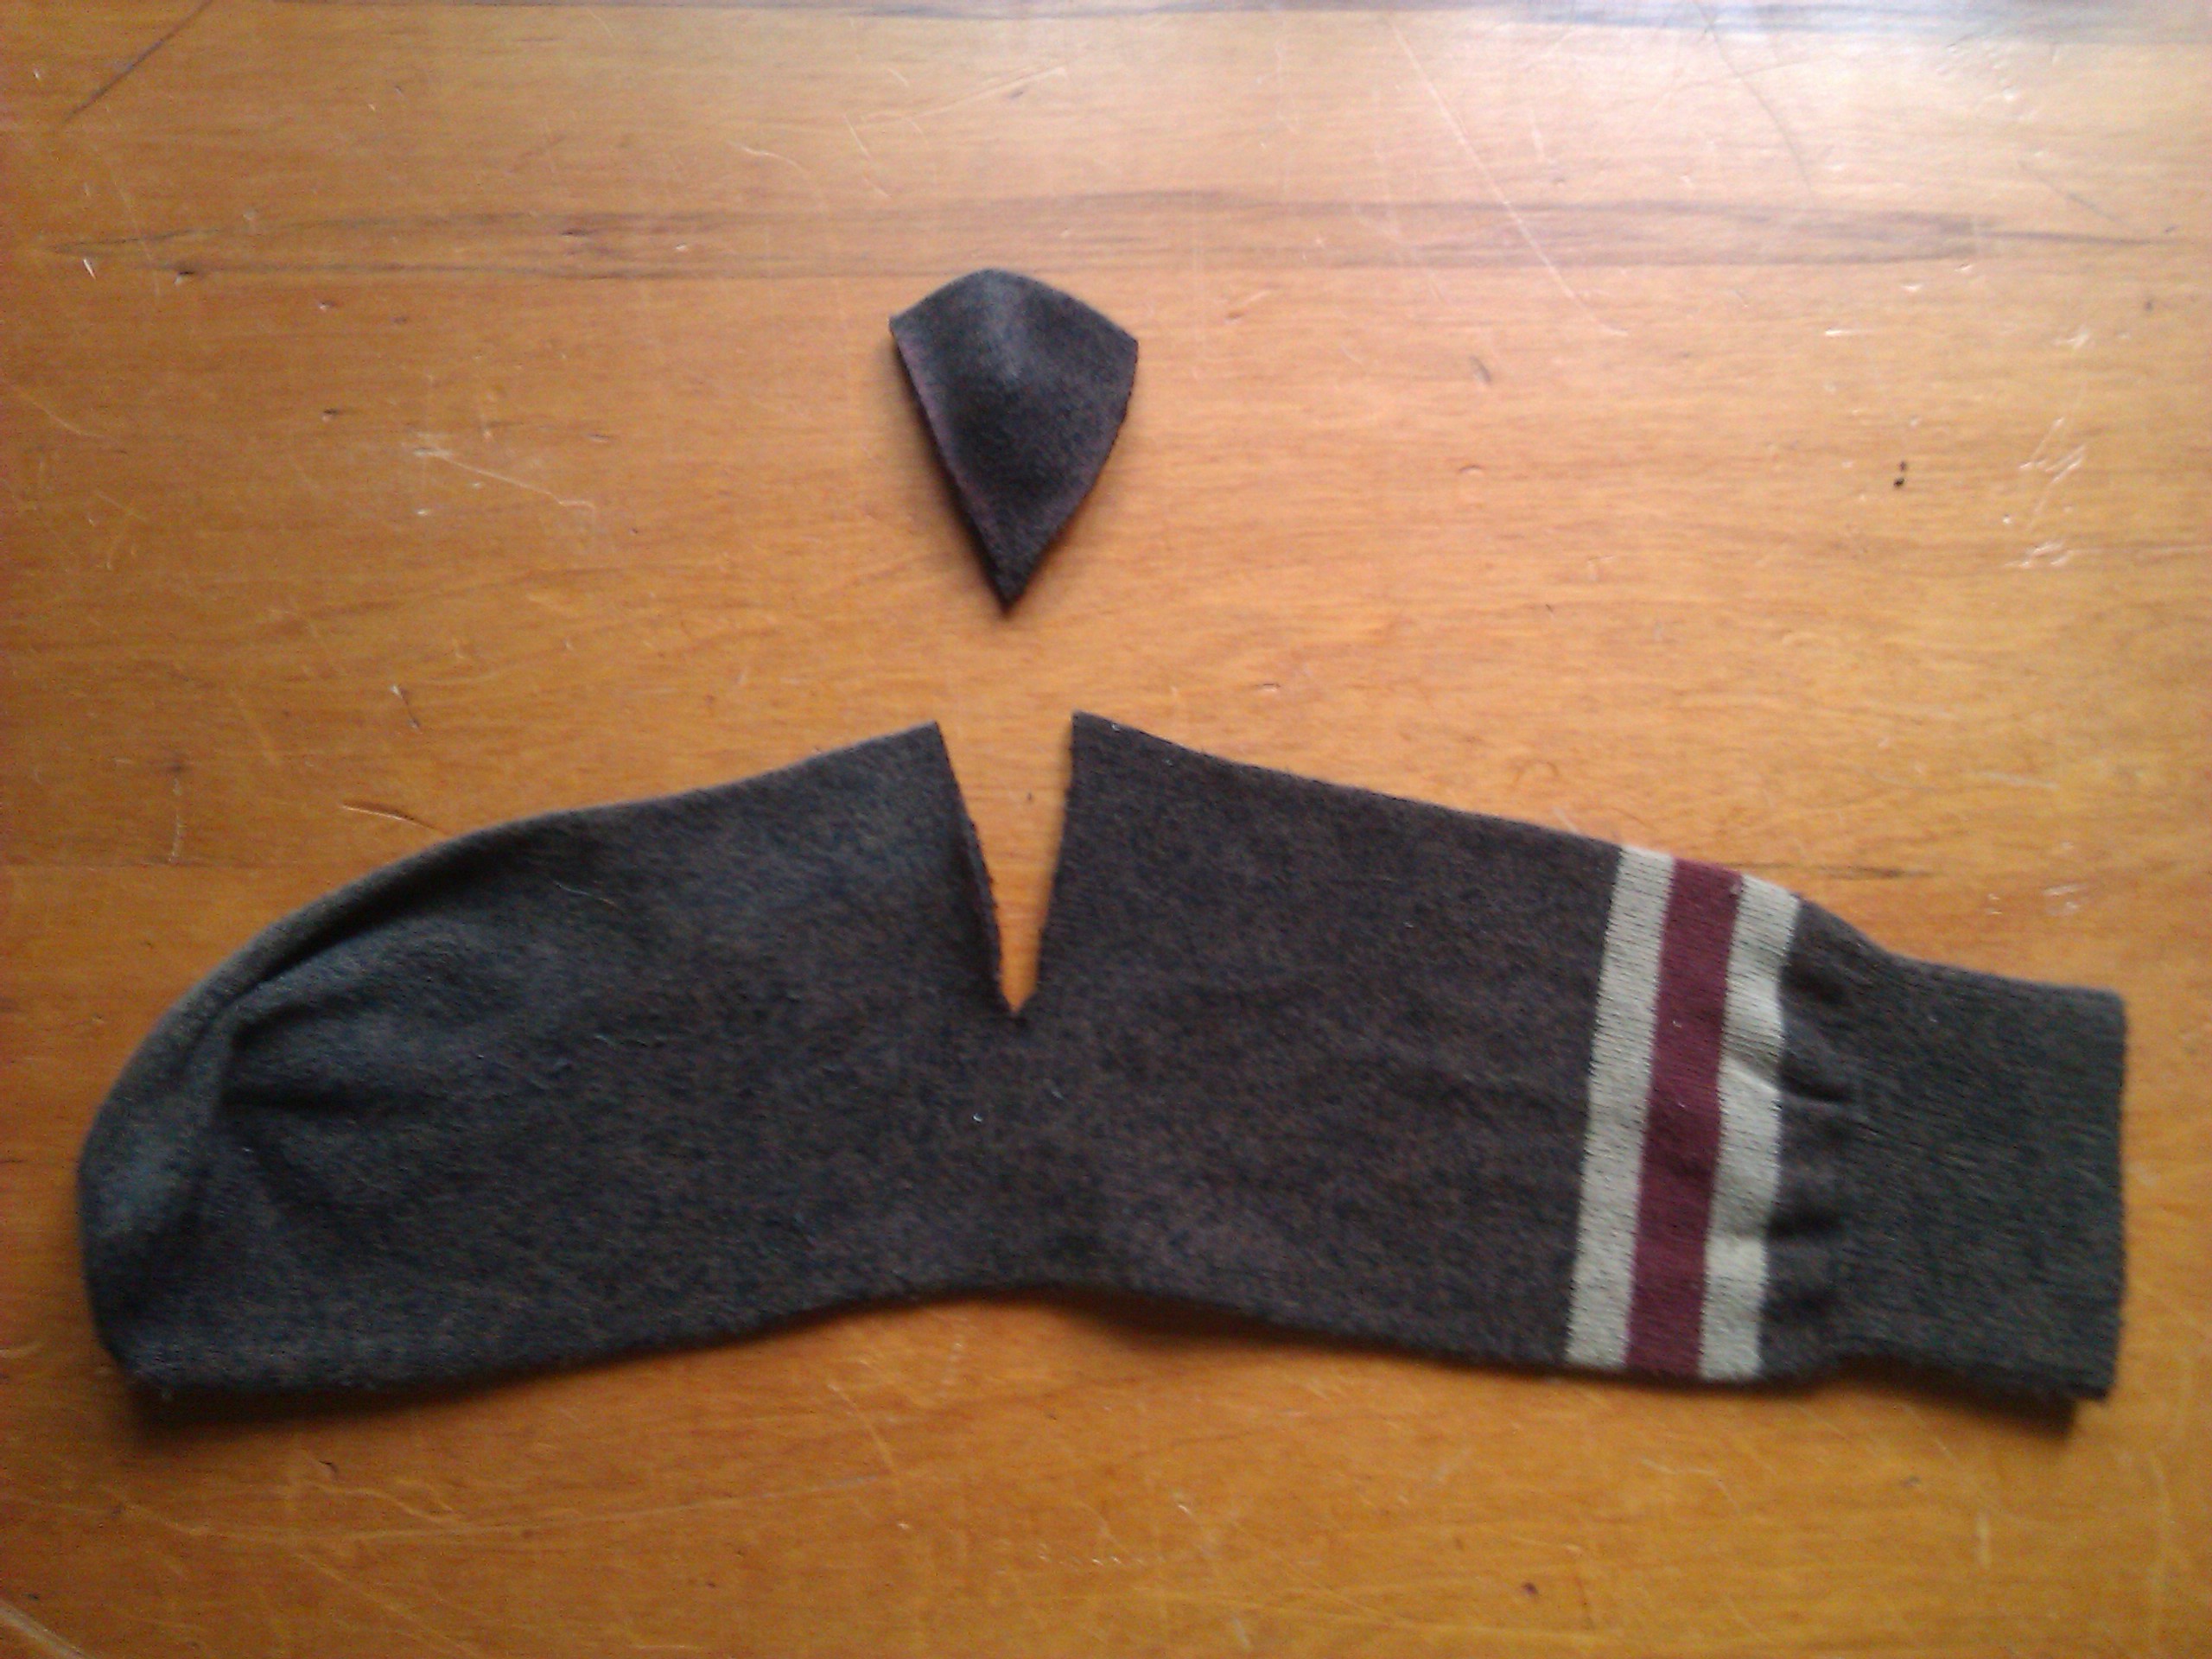
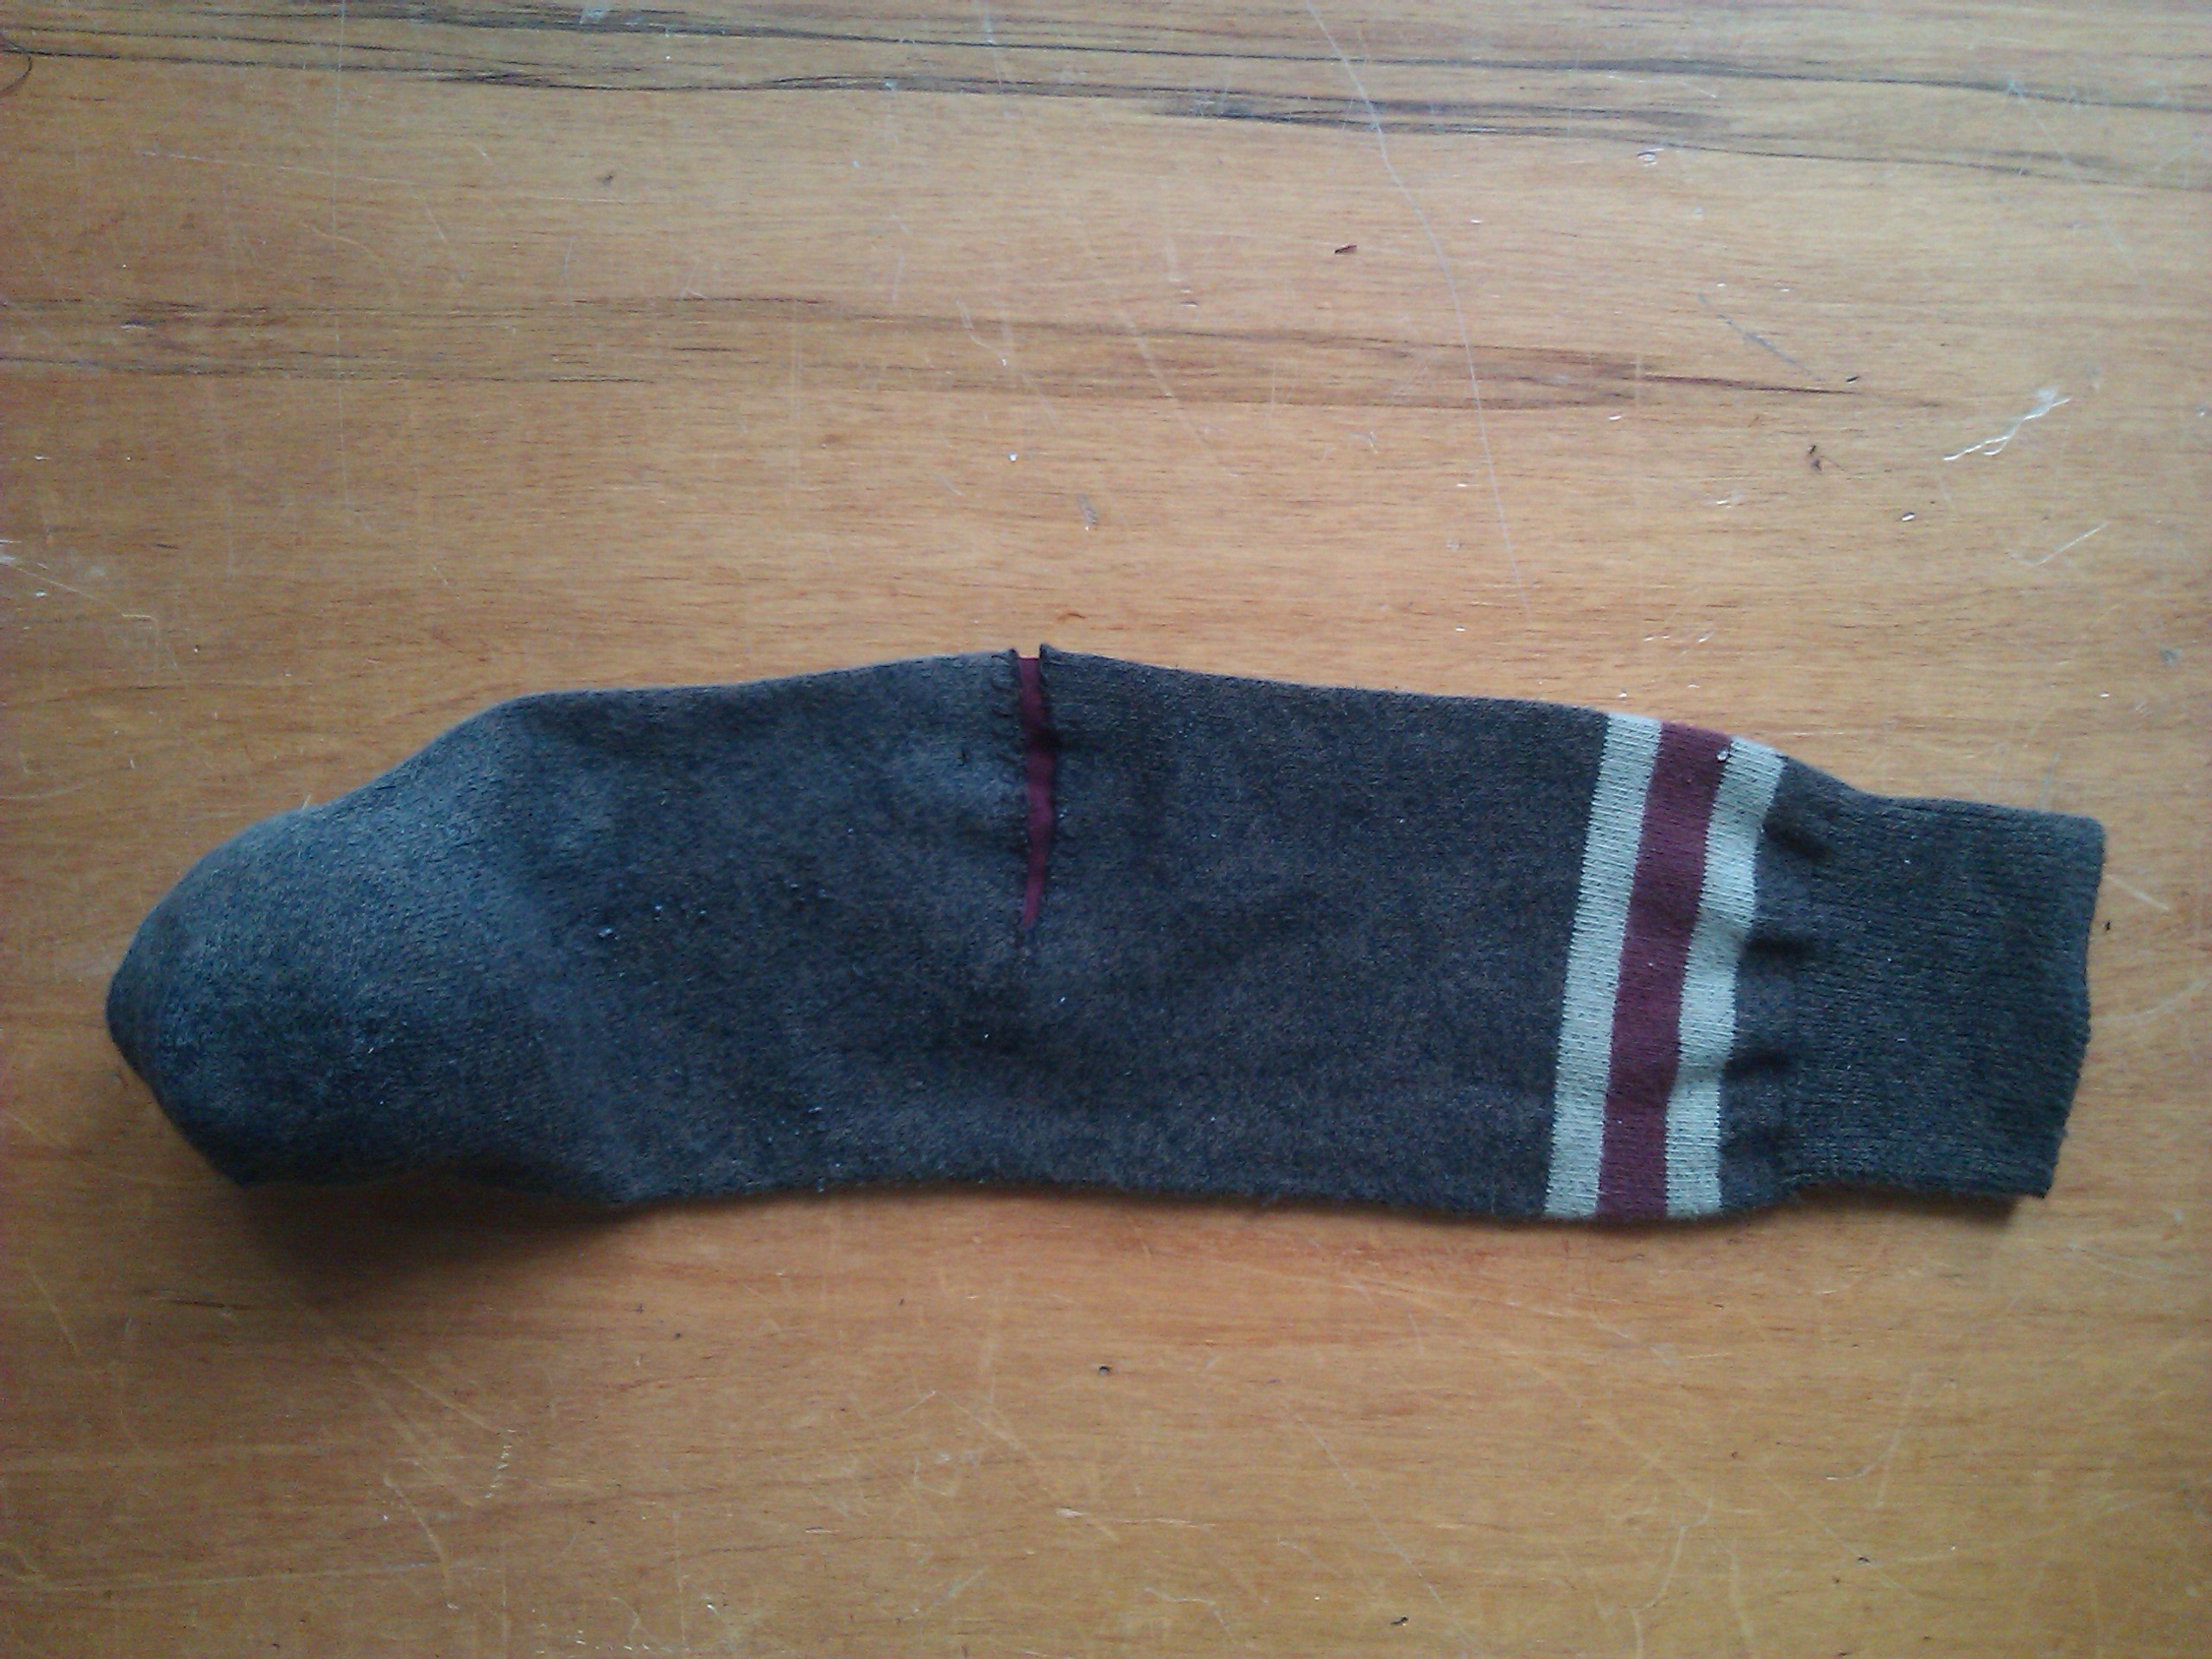
First, cut the heel out of your sock, and put it aside. Your sock should now be tubish, but with a slit in it.
Cut a piece of fabric (I used red) big enough to fill in the slit and apply it to the wrong side of the sock. A bit fiddly, but best done when the sock is right-side out, in my opinion.
This forms the first hack neck-wound; have it as wide or as narrow as you like. Use blanket-stitch to attach the raw edges of the sock to the under-fabric. Ragged and messy is perfectly acceptable. A vorpal blade is not a delicate weapon.
Then insert the tennis ball into the toe of the sock. This will be the head.
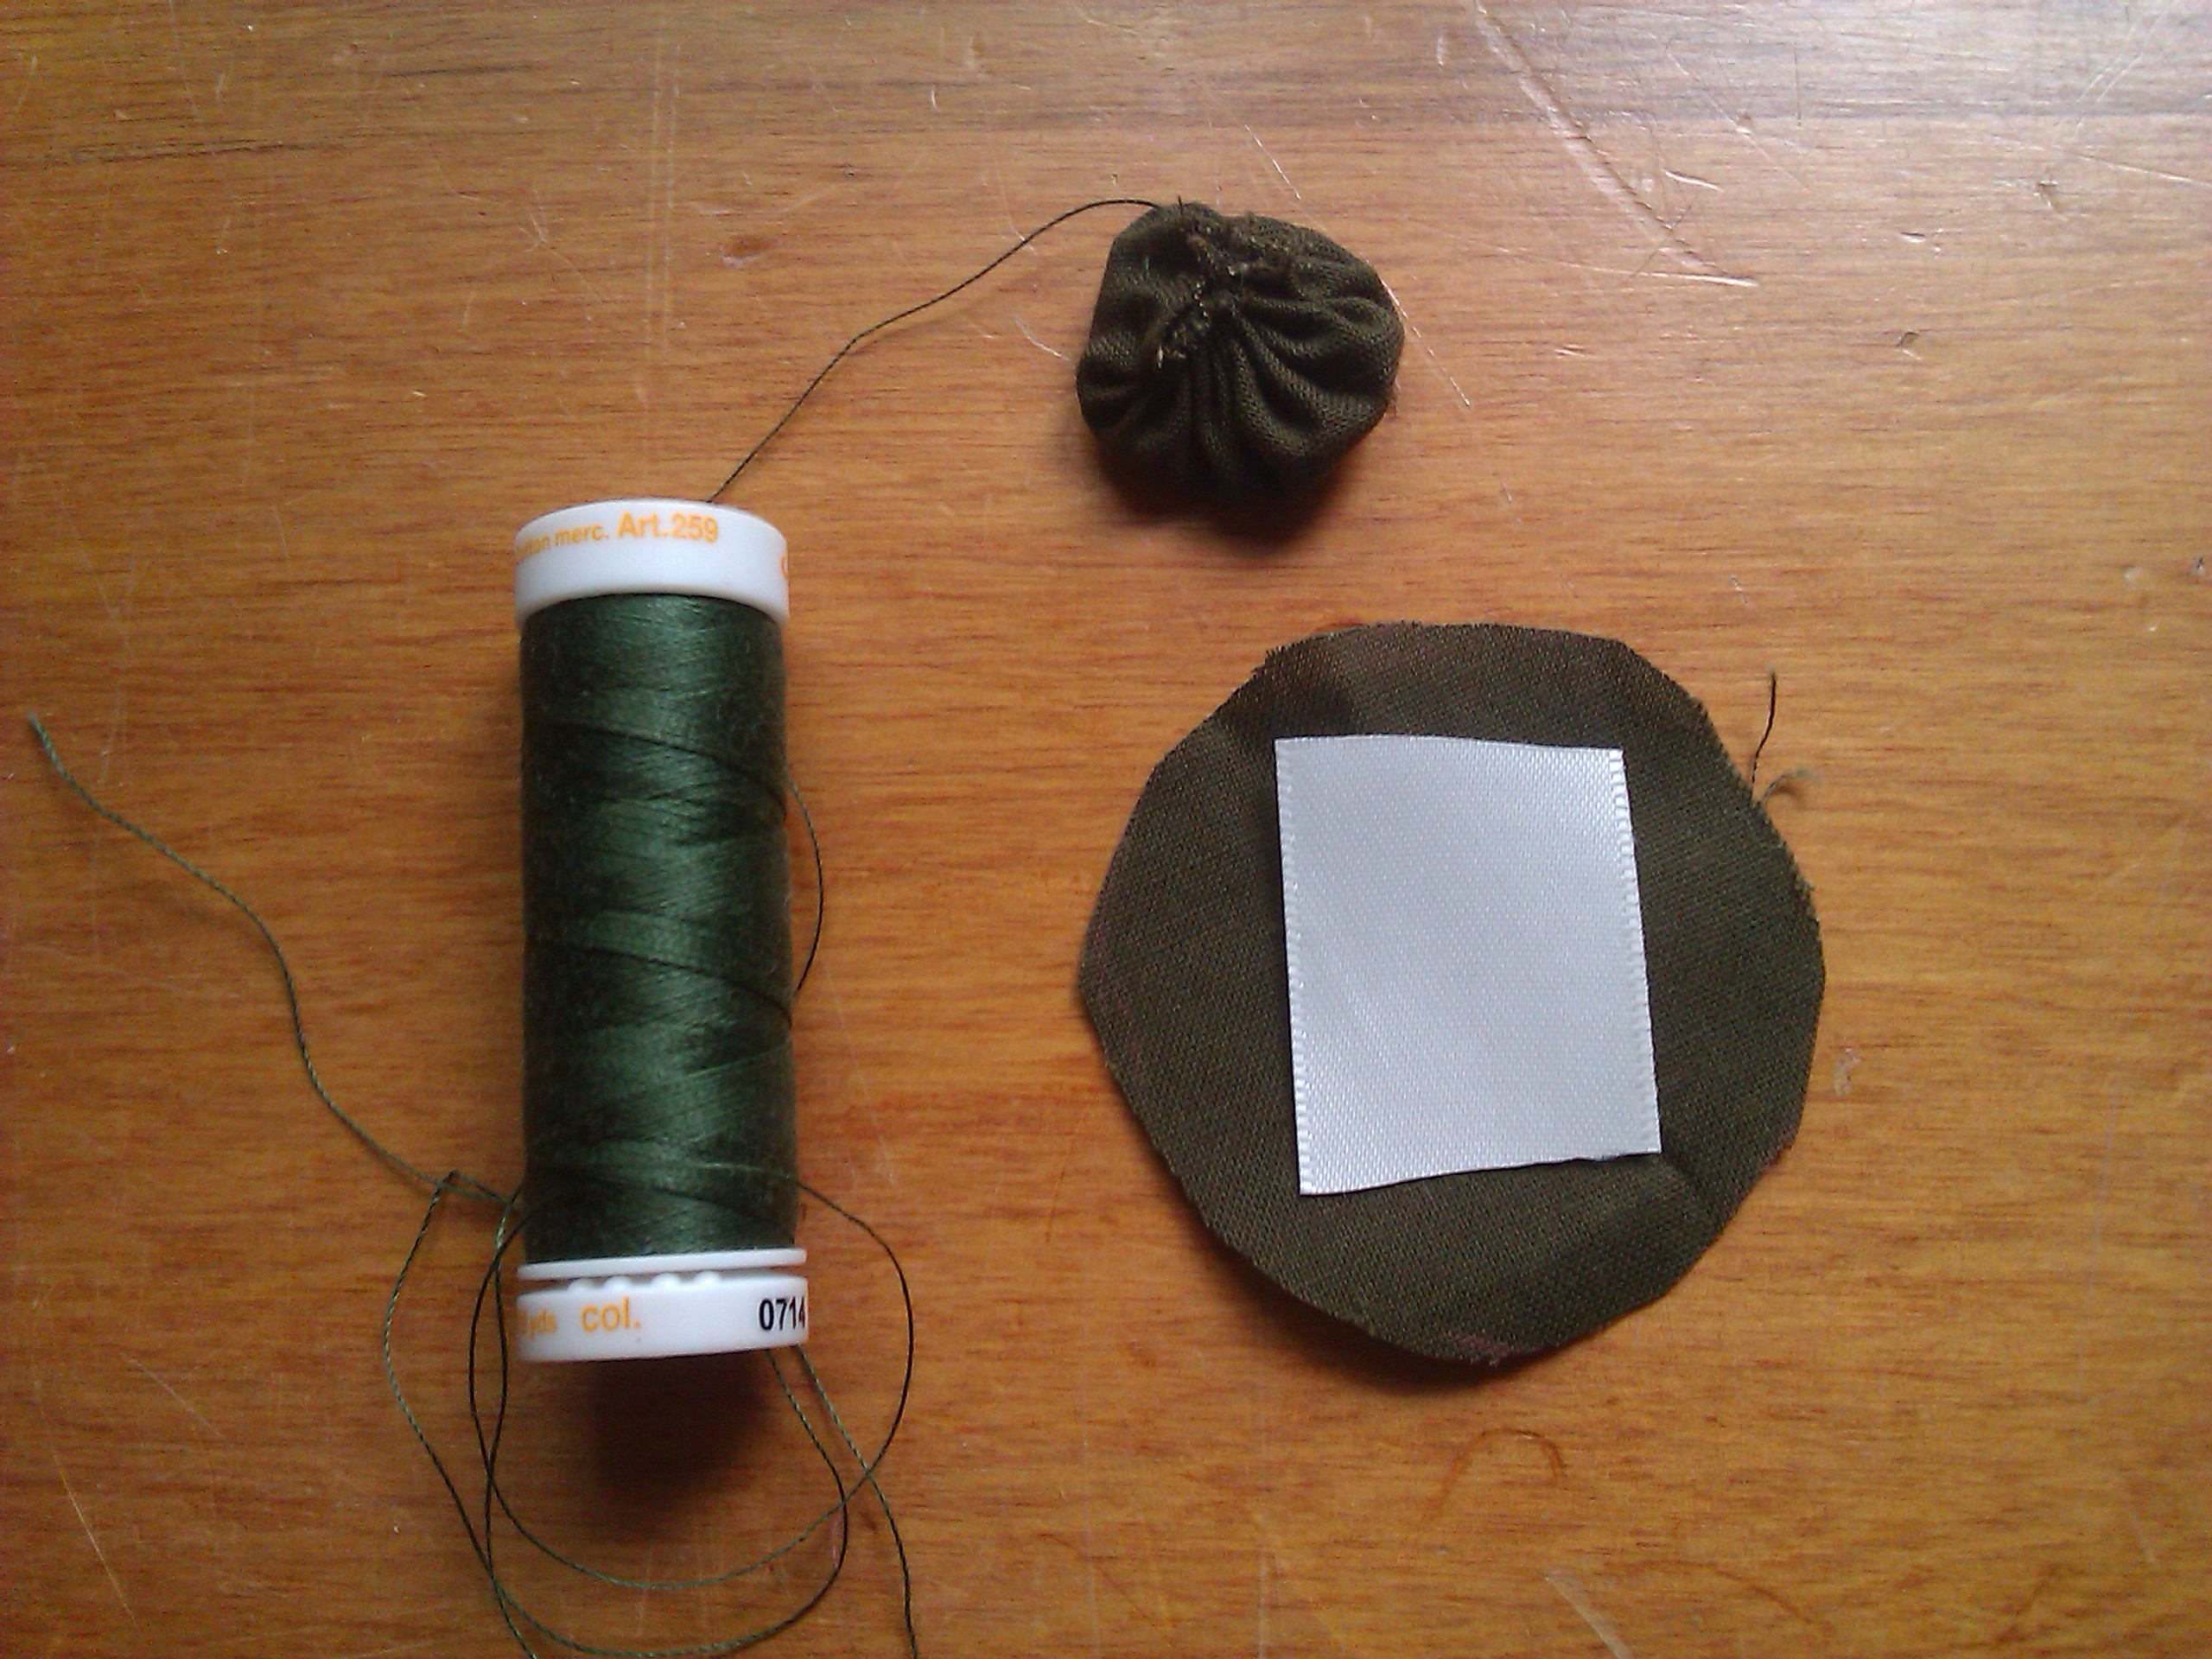
The Eyes
Cut two circles of fabric (I used olive green) each about 5cm (2in) across. Do a quick running stitch round each, about 5mm (1/4in) from the edge. Cut a piece of white fabric or ribbon (about 4cm or 1 1/2 in long) and place this in the centre of the wrong side of each circle, before pulling on the thread to gather the circle into a puff. These are the eyes.
The Mouth
Lips: cut the heel piece in half lengthwise, then fold each half lengthwise (right side out) and whip-stitch the raw edges together, folding in the scraggy ends.
Teeth: cut two lengths of white fabric or ribbon (beware, ribbon frays), each twice the length you want the teeth. I made the upper teeth longer than the lower. Fold each piece in half – raw ends together – and sew down the sides. Stuff gently, then quilt a groove down the middle of each to create two teeth (this is where I used the orange thread).
If you want it to look extra tidy, you could sew wrong sides together and turn before stuffing – I didn’t, and it isn’t too obvious. (I think.) Also sew along the bottom of the teeth so the stuffing doesn’t come out.
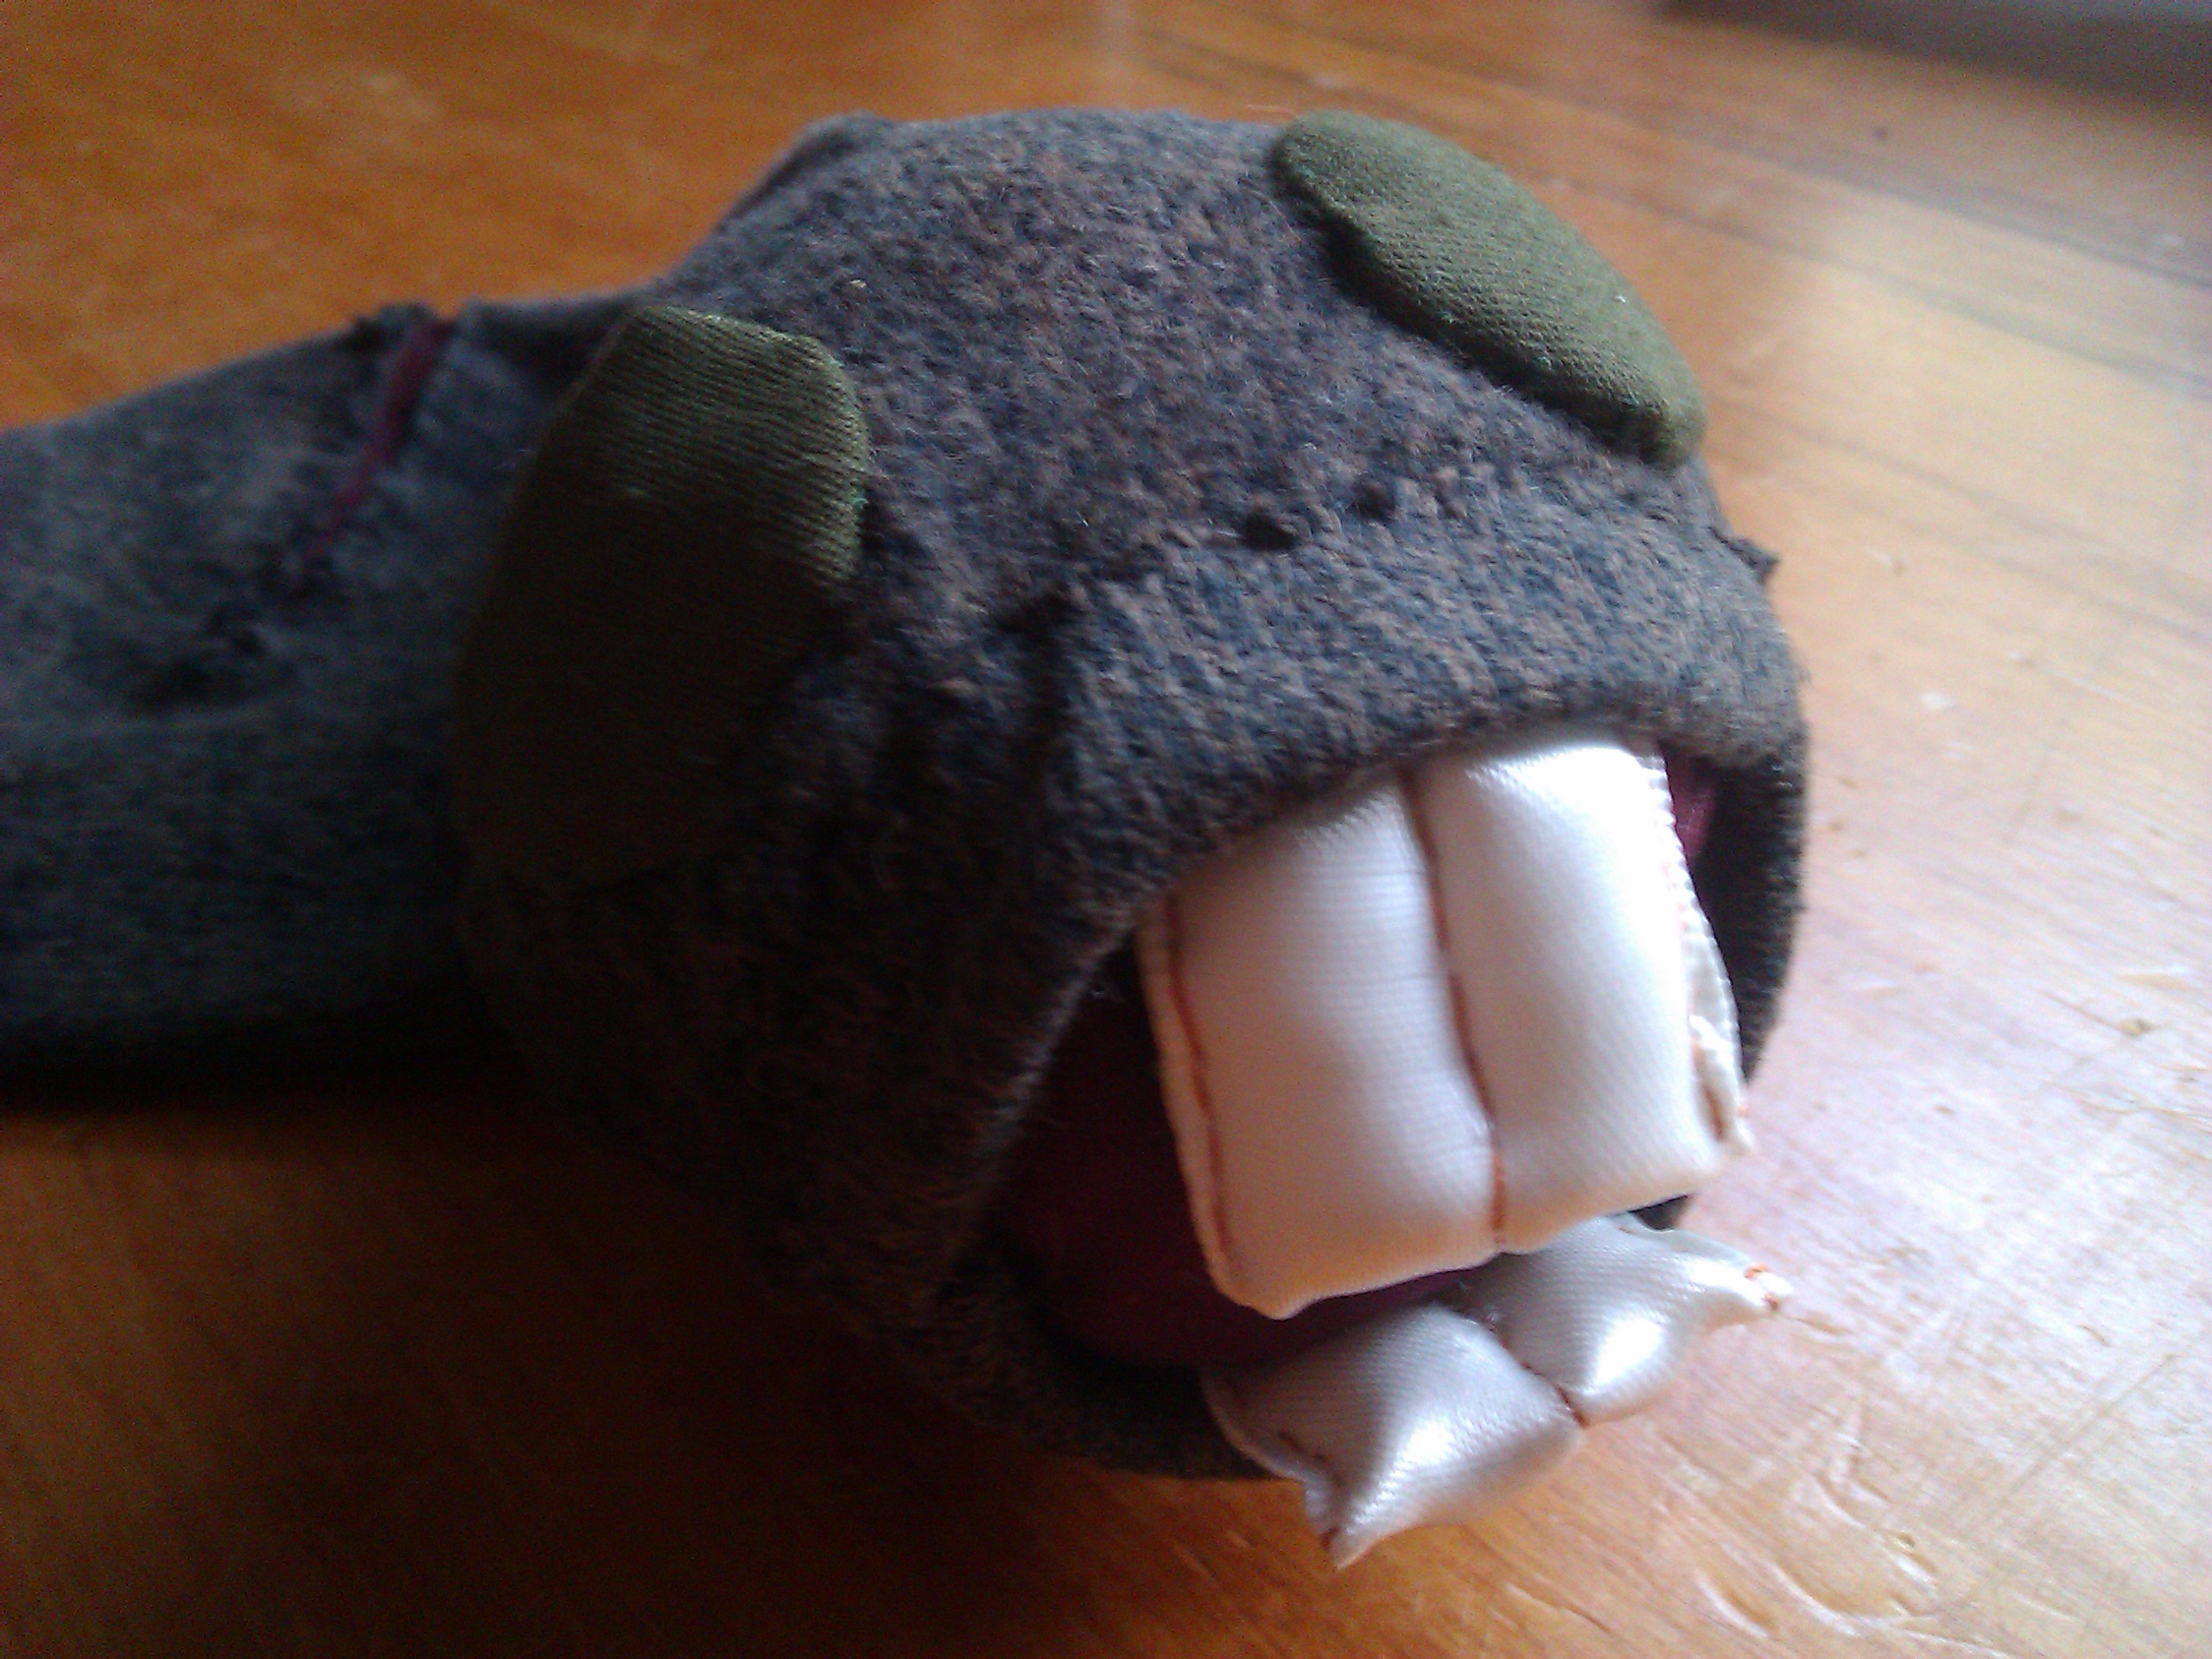
The Face
Cut a piece of fabric (again, I used red) the shape and size you want the mouth. If you aren’t sure, consider the size of the lips. Pin this fabric to the head (refer to pic for placement) and sew down the edges – doesn’t have to be tidy as the lips will cover it.
Sew the teeth on, lining their raw edge up with the edge of the mouth piece. Again, doesn’t have to be perfect – Jabberwockies are not noted for their good teeth. (It’s “the jaws that bite” not “the jaws with the perfect bite”.)
Then sew on the lips by their whipped edges. These should cover the edges of the mouth fabric and teeth.
Sew the eyes on smooth side out (refer to the pic for placement) using tiny whip stitches around the edge of each eye.
Your Jabberwocky should look something like this.
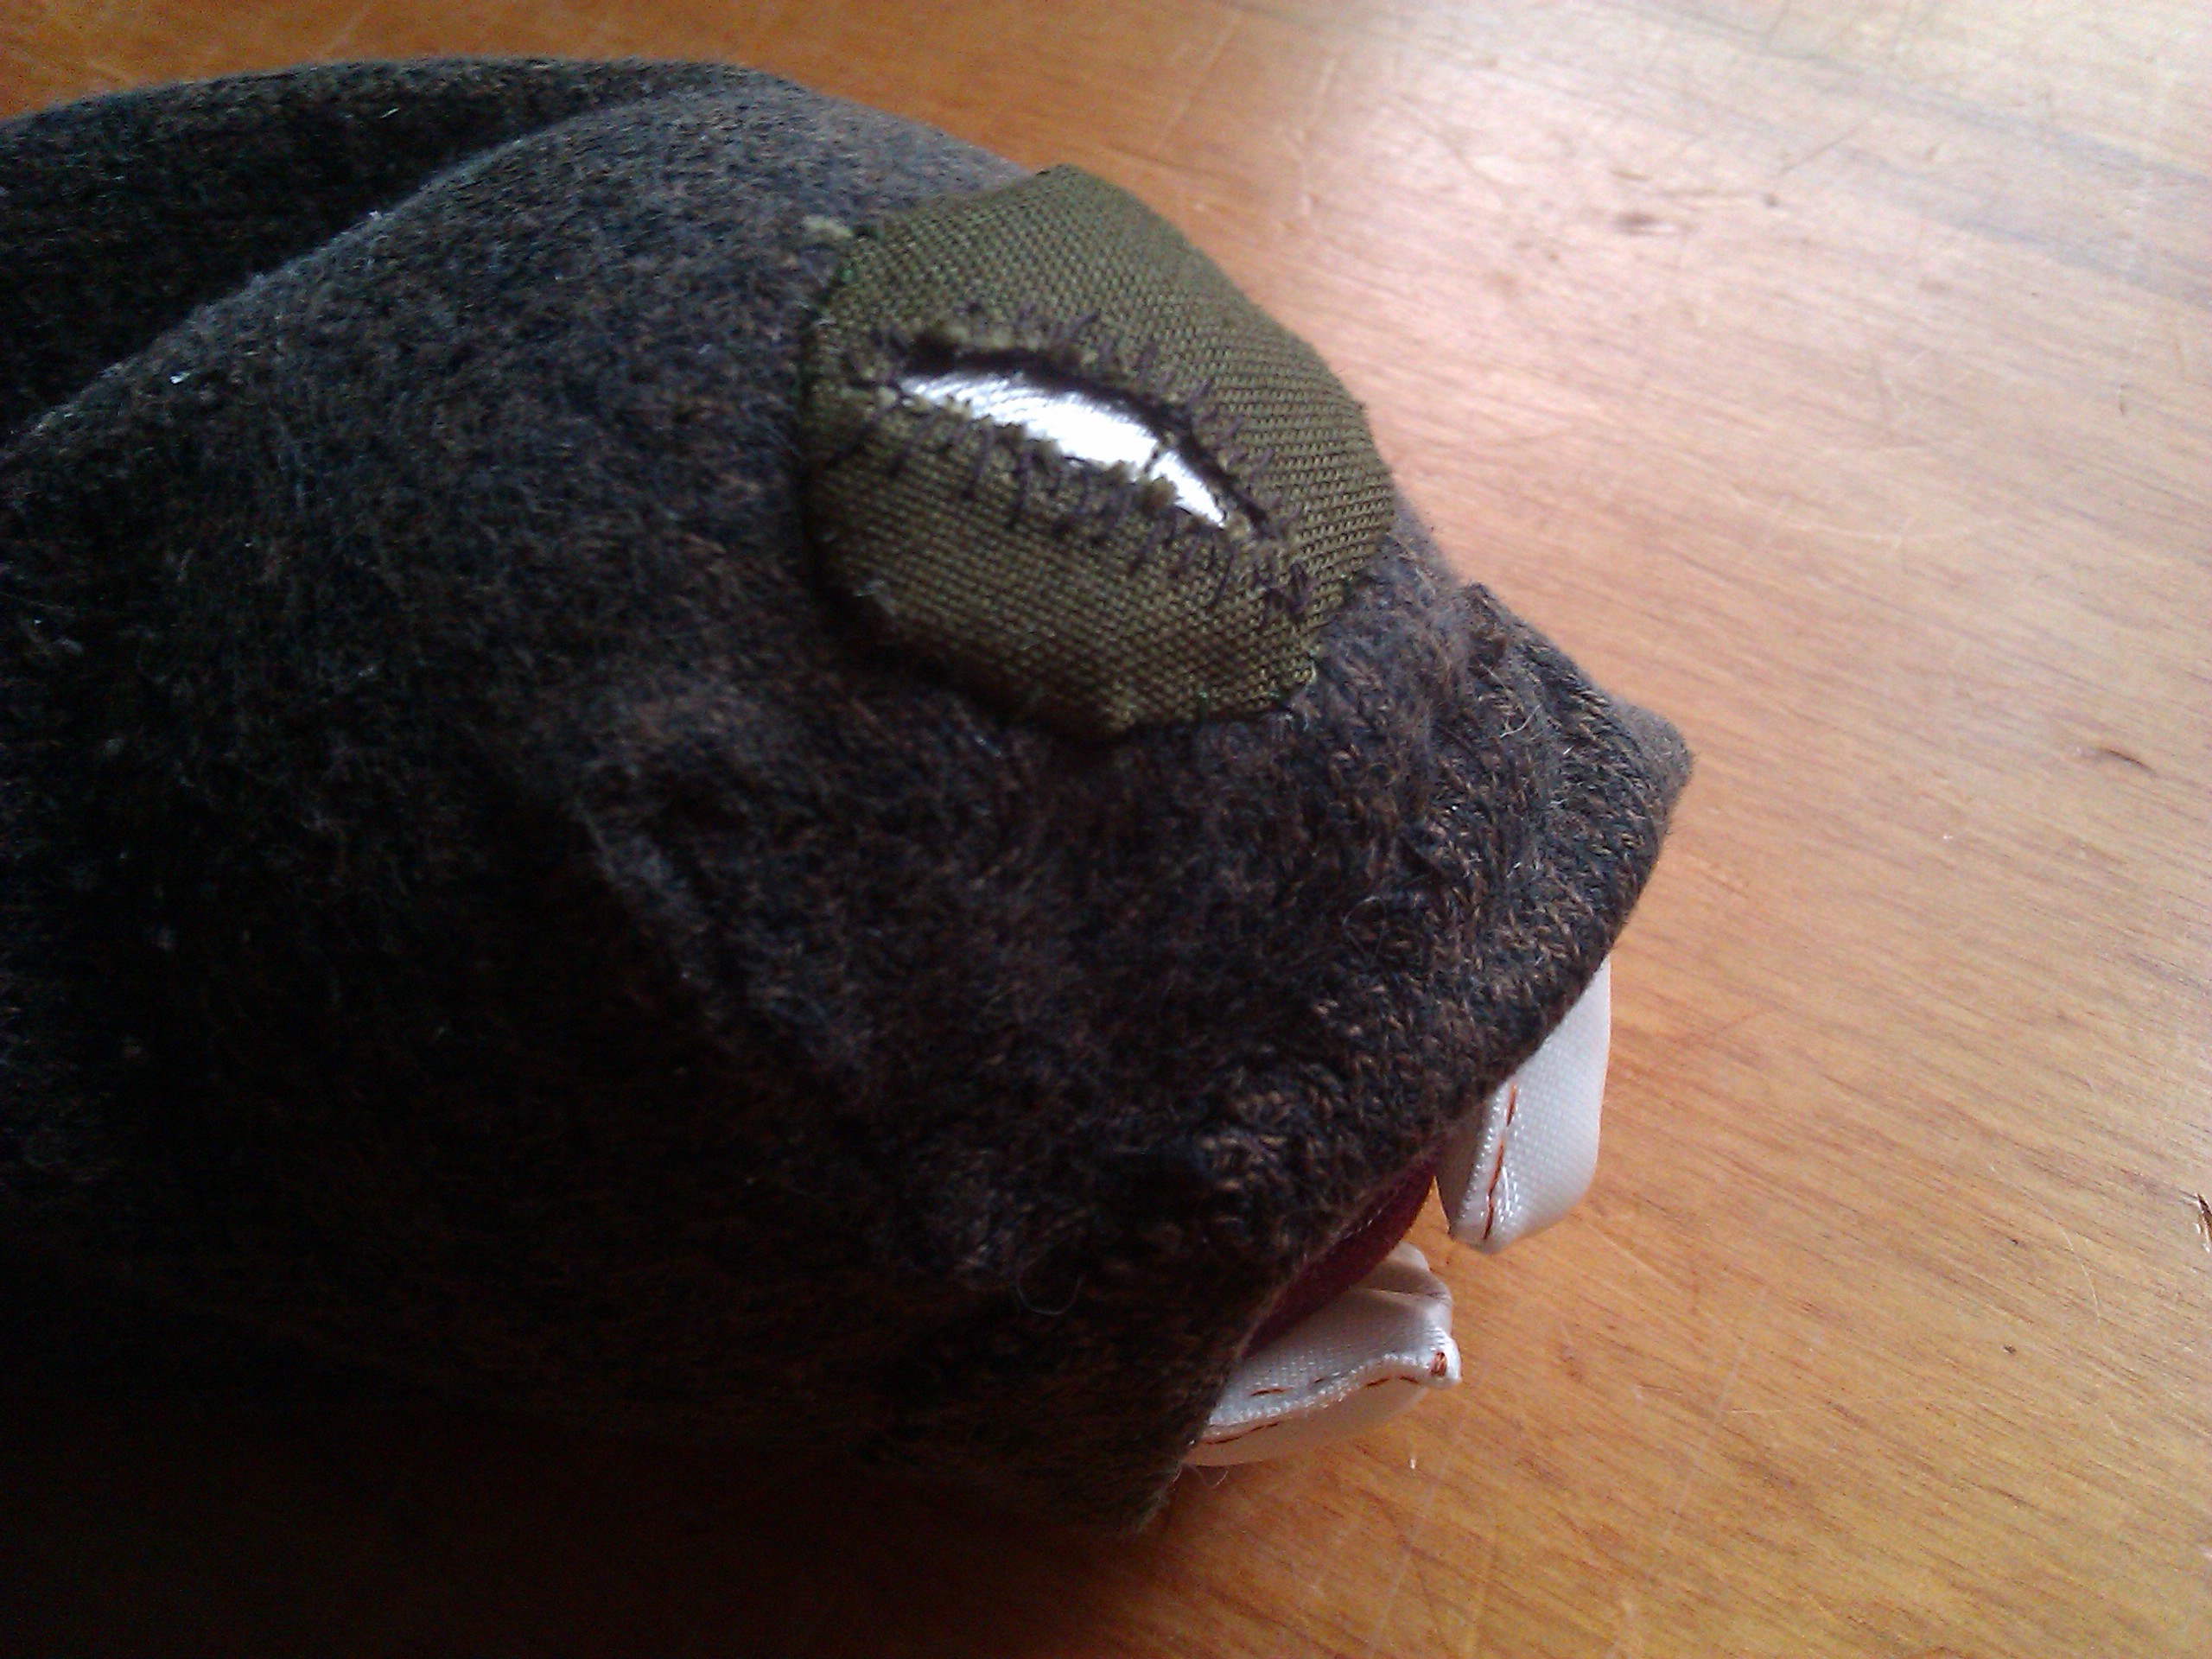
Now the fiddly bit: using a small pair of sharp scissors, cut a slit in each eye about 2/3 of the way down, being careful not to cut right to the edge, or through the white underneath. Neaten the raw edges with whip-stitch or blanket-stitch (eyelashes!).
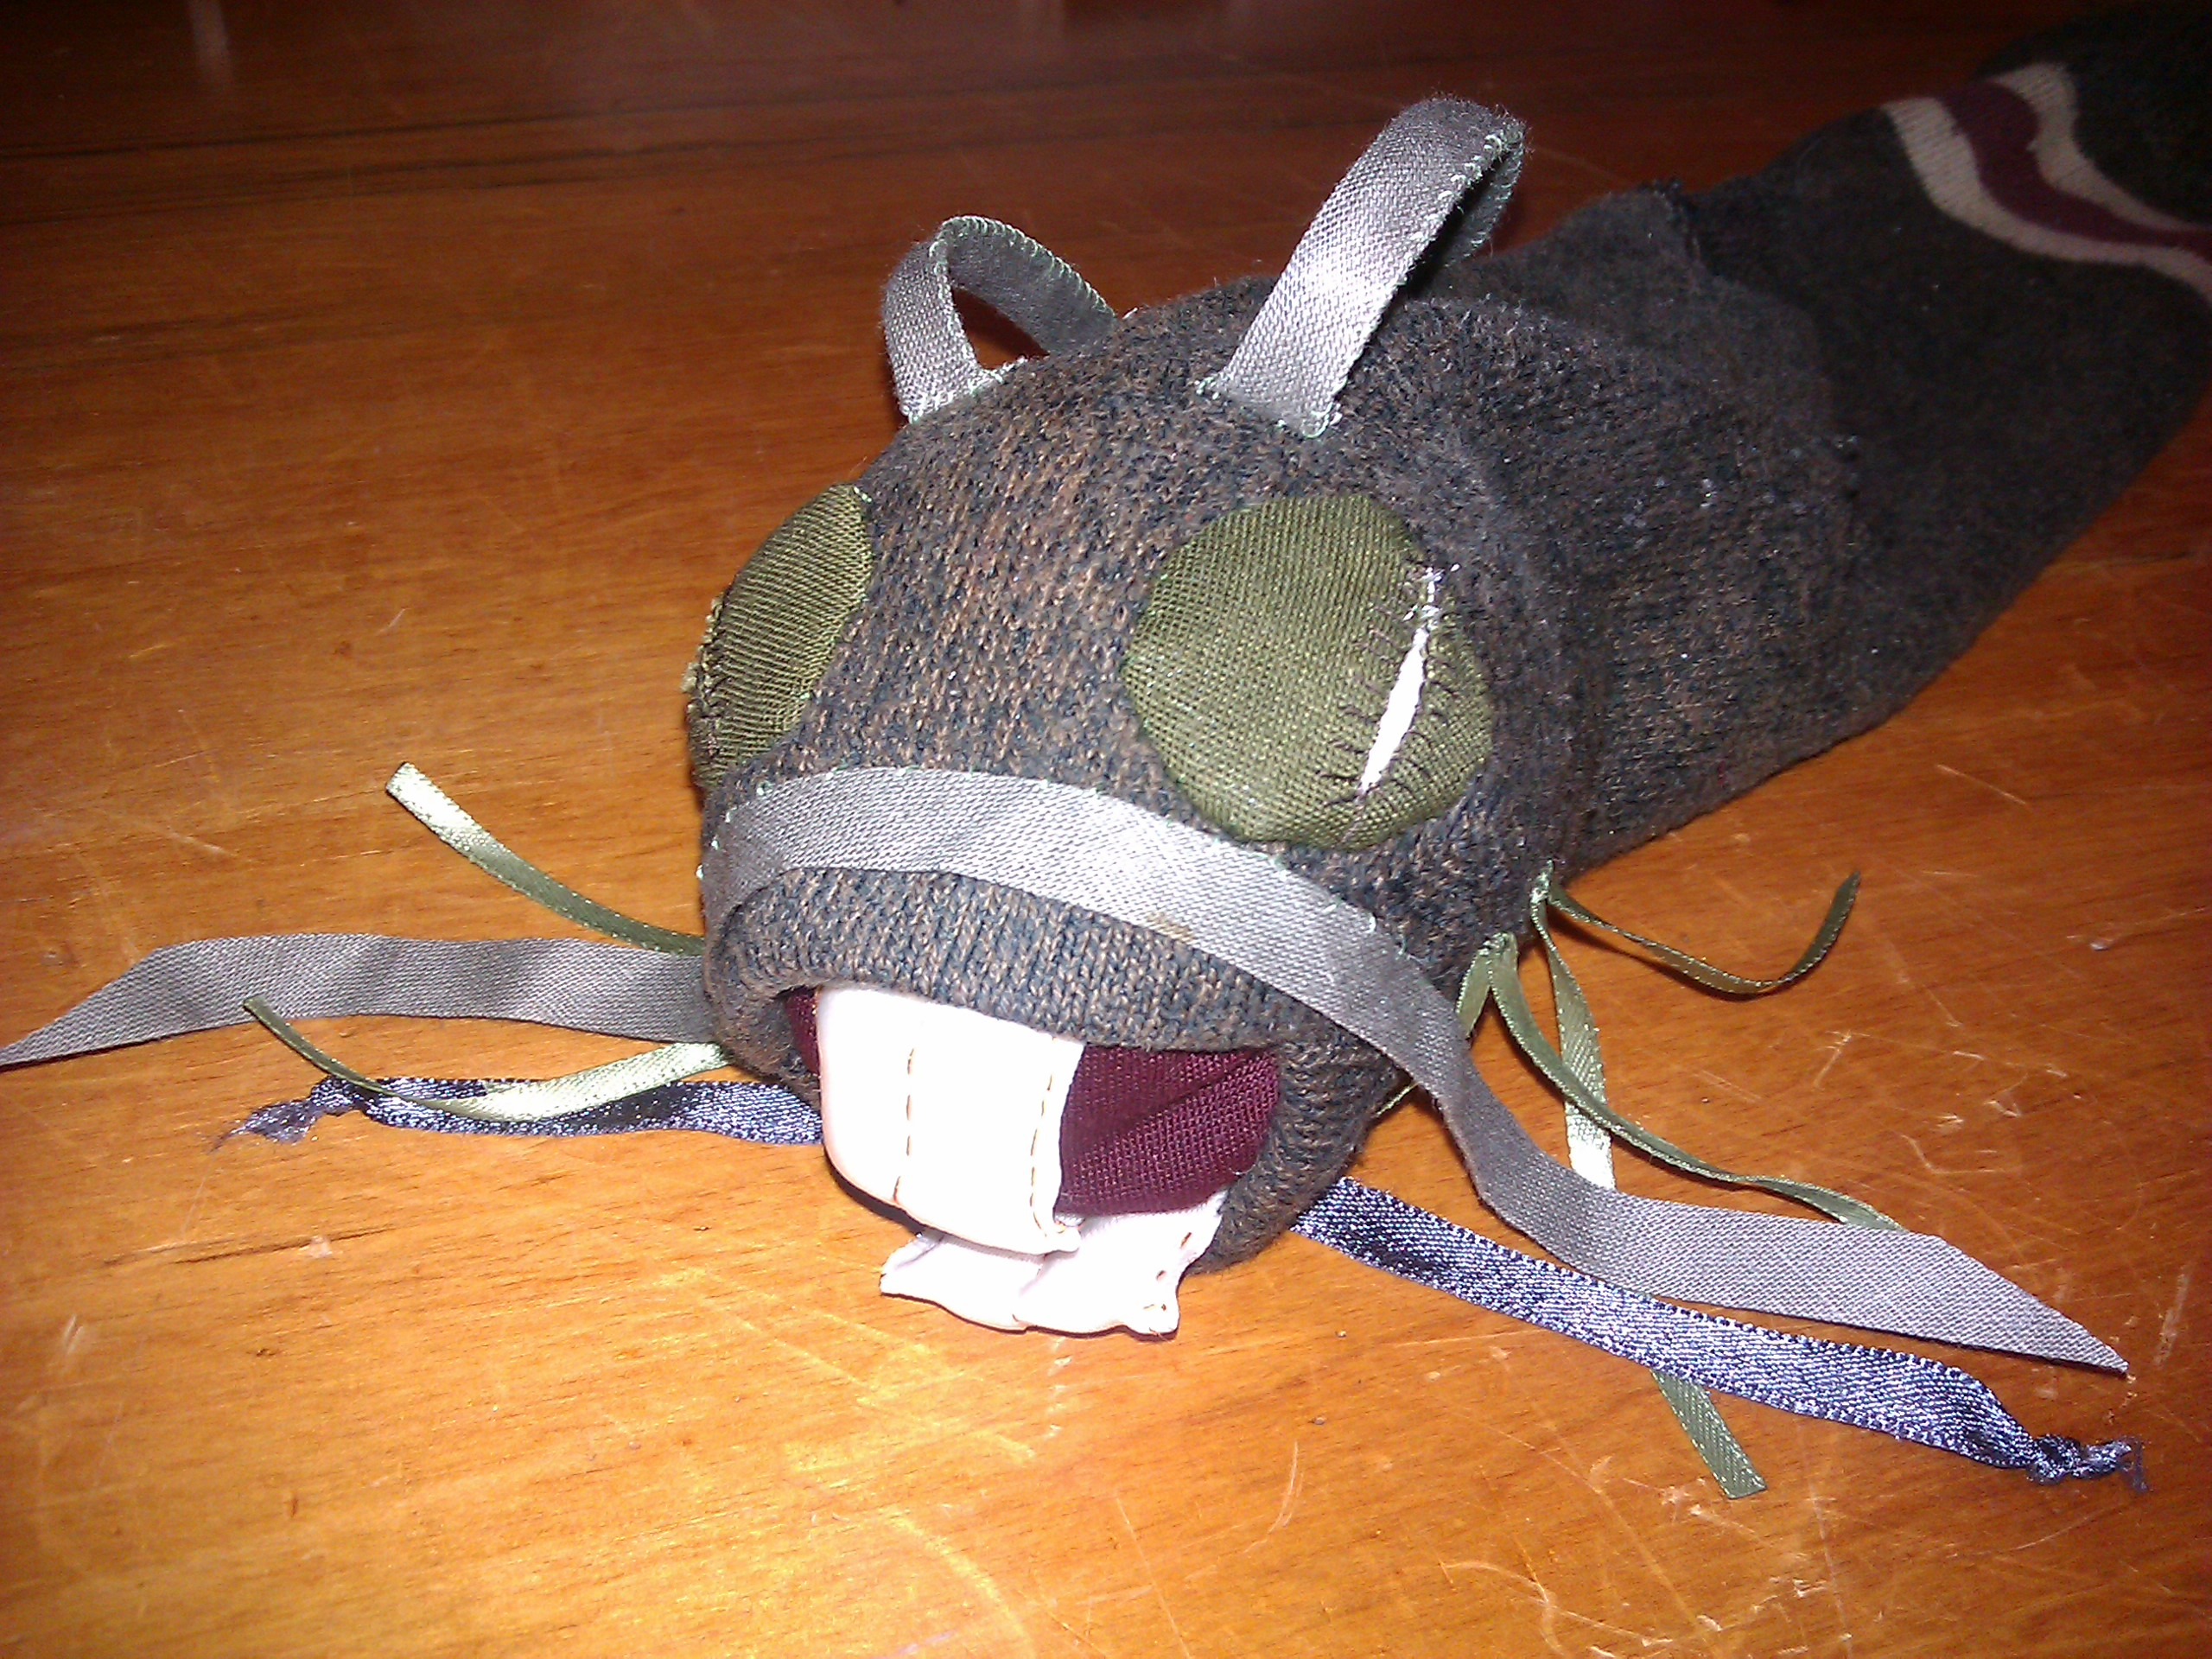
The Bits
Use any combination you like of the ribbons, bias binding etc to create chin spikes, horns, fleshy mustachy bits, or any other facial excrescences that take your fancy. (I used bias binding with cord inside it for the ‘horns’.)
Follow Tenniel’s depiction or your own fancy, whichever you prefer.
The Coup de Grâce (Finishing Off)
Trimming: If there are any unwanted bits at the top of your sock – decorative bands, tight ribs etc – now is the time to whack them off. Use a vorpal blade, or failing that, scissors.
Stuffing: Your Jabberwocky can be stuffed as loosely or as tightly as you like. Too much stuffing, and the head will be smaller than the neck; too little, and it will be a sock with a tennis ball in it.
Where the Vorpal Blade went Snicker-Snack: Figure out how wide a circle will be needed to fill the hole at the top of the sock. If uncertain (as I was) try the lids of jars etc until you find one that fits comfortably without stretching the sock. Draw around this on your fabric (I used the red), cut out, and attach with blanket-stitch. Again, this is a gaping wound, so don’t feel your stitches need to be even and regular.
O Frabjous Day! Your Jabberwocky is complete.
And now for the stress-relieving part. When your work is not going well – be it writing, rewriting, or anything else – simply pick the beastie up by the neck and bounce its ugly head on the desk, walls, floor or any other firm surface within reach. (Now you know why tennis ball.)
Possible variations include shank buttons covered in fabric for eyes; a loop for hanging the Jabberwocky up; or if you’re feeling very adventurous (and have a long sock), a Jabberwock-Ouroboros or even a Merlion.
As with everything I put on this blog, these instructions and photos are licenced under a Creative Commons Attribution Share-Alike 3.0 New Zealand licence.
Which means that you are welcome to make any use of it that you please, including your own derivative works (even commercial if you like) as long as you a) say where you got it from, and b) share the same way.
Please leave a comment if you make something based on this – I’d love to see what you do with it!