No, I didn’t have to mount a daring raid to rescue my ironing board from an international gang of ironing-board abductors (if such things there be).
When I read this post from the Dreamstress, I realized that the cover of my ironing board needed replacing too – had needed it, according to my comment, for about the last ten years. So naturally, having waited for the Seven Years of Symbolic Significance to pass since then, this week I did something about it.
To be perfectly honest, I don’t think I’d ever in all my puff seen the actual cover. Instead, I saw the tatty old bit of fabric that had been stretched over it in days of yore (held more or less in place by a metal band with one screw, two bolts, and two nuts). It had in the course of years picked up scorch marks, glue lines (it’s a dangerous world out there for a flat surface), and overall fading – not to mention an annoying habit of flapping its loose corners up over the board to create wrinkles in whatever was being ironed.
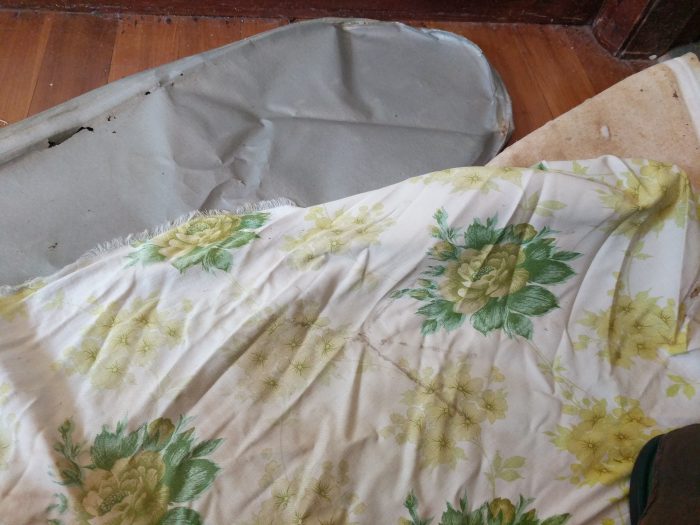
And as you can see, the layers underneath (shiny cover top left, manky padding top right) were just as bad, if not worse. So I stripped them all off, gave the board a good scrub, and then discovered that some old ironing boards had asbestos among their layers. After a bit of research by the Caped Gooseberry, we decided we were probably safely operating in an asbestos-free environment. Phew.
Having decided to strip the board right back to the metal beneath, I had to come up with some padding, as well as a suitable fabric for the cover. (Two sites I found useful were this one and this one. Other sites have ideas for if you are using elastic, which I wasn’t.) The padding was relatively easy – old army blanket, the hour of thy usefulness is once more upon thee – but the question of what fabric to use for the cover was a rather more difficult one.
It needed to be 100% cotton, to withstand the heat, and sturdy enough to cope with the wear it would get. I had some denim – but that wouldn’t gather well, and life is too short to go into tailored wear for ironing boards. Old stripy flannel sheet? Too fluffy – you don’t want the board to glom on to what you are ironing and never let it go. Old plain sheet? Too plain – really highlights the wear and tear of the iron rest. Nice green floral originally purchased for another reason, but annoyingly off-grain? Less plain, but also highlights the wear and tear.
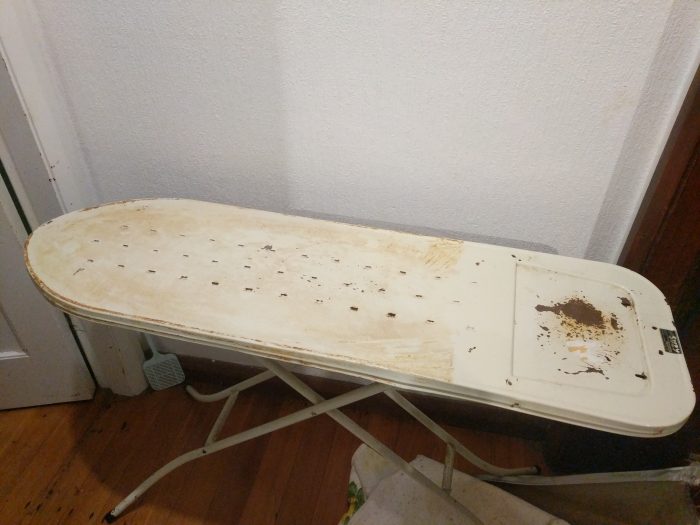
I really didn’t want to go out and buy something just for this. In the first place, why spend money you don’t have to? And in the second place, waiting until I organized a trip to the fabric shop (sadly no longer walkable) could mean an extended period of crumplitude while I didn’t have a working ironing board.
In the end I found in my stash something which, while not perfect, would do the job. It’s a sort of goldy mustardy pumpkinny colour, depending on what light you get it in, which means that it draws attention away from the wear and tear without being so Rah Rah itself that you get eyestrain from sharing a room with it. A quick snip and strike of match, and I was assured of it not containing any pesky synthetic fibres.
But first – the padding. Blanket on kitchen floor, board upside down on blanket, tailor’s chalk to draw around the body. Simple as. Two layers didn’t provide quite enough disguise of the board’s essential metal, so I cut a couple more. Much better! Here you see them pinned together, ready to sew.
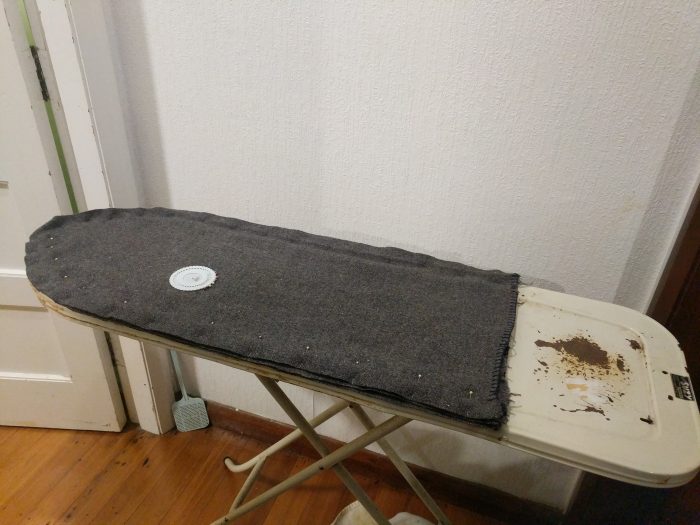
My trusty hand-crank sewing machine took four layers of blanket in its stride (its stride having been carefully adjusted to approx eight stitches per inch for the purpose). I sewed it in two goes, each one going from the square end to the round end. It seemed a bit ridgy at the edge. Now what? The whole thing languished at the foot of the stairs (not sure why it was there to start with, but there it was) for a couple of days while my hindbrain tried to figure out which door did not have a goat behind it.
The tricky thing at this point was that I didn’t know how much smoothing of blanket-layers would be exerted by the cover until the cover was in place, by which point it would be a right pain to make any changes. I decided to carry the ironing board back upstairs (don’t know why that helped, but hey, if it works, it works) and used the padding as a makeshift cover while ironing the cover fabric flat.
This revealed that the cover fabric would stand up to being ironed on the hottest setting, which is all to the good, as melting ironing board covers are not ideal. On the downside, it also revealed that the answer to the How Much Smoothing question was definitely going to be somewhere in the Not Enough range.
So, having discovered a goat, I set about making the best of it. First I cut out the fabric for the cover. After some hesitation, I just folded it in half lengthwise and eyeballed it – a bit of a foolhardy move, as I didn’t have enough of the fabric to try again if it was a disaster. I compounded the risk by using the narrower part of the L-shaped piece, because that way I could use the selvage as the square end and save myself some extra hemming.
Redeploying the iron and the blanketty pad, I pressed a narrow (0.5cm, say) fold round the raw edges, and folded it over again more widely to form a channel for a drawstring. Press, pin, consult sewing machine manual to remind self of how to fill bobbin, fill bobbin, sew. The results were most satisfactory, but the question remained: was it going to work?
Quick-unpick (aka seam-ripper) in hand, I set about unpicking the stitching that held the blanket layers together in such an unfortunately ridgy way. After a foot or so, I realized that I could turn seam-ripper myself, so I did, taking half the layers in each hand and rending them one from the other. Most satisfactory.
I then repaired to the ironing board, bearing the four now separate layers of blanket, the stitched cover, a length of somewhat manky pink bias binding, a hairpin, and the Shorter Oxford Dictionary (Volumes I and II).
The hairpin went on one end of the bias binding, which was then threaded through the drawstring channel of the cover. The four layers of blanket were carefully laid out on the board, with bits snipped and layers flipped as seemed best to get a smooth result. The threaded cover was then very carefully placed on top, followed by the SOD I & II.
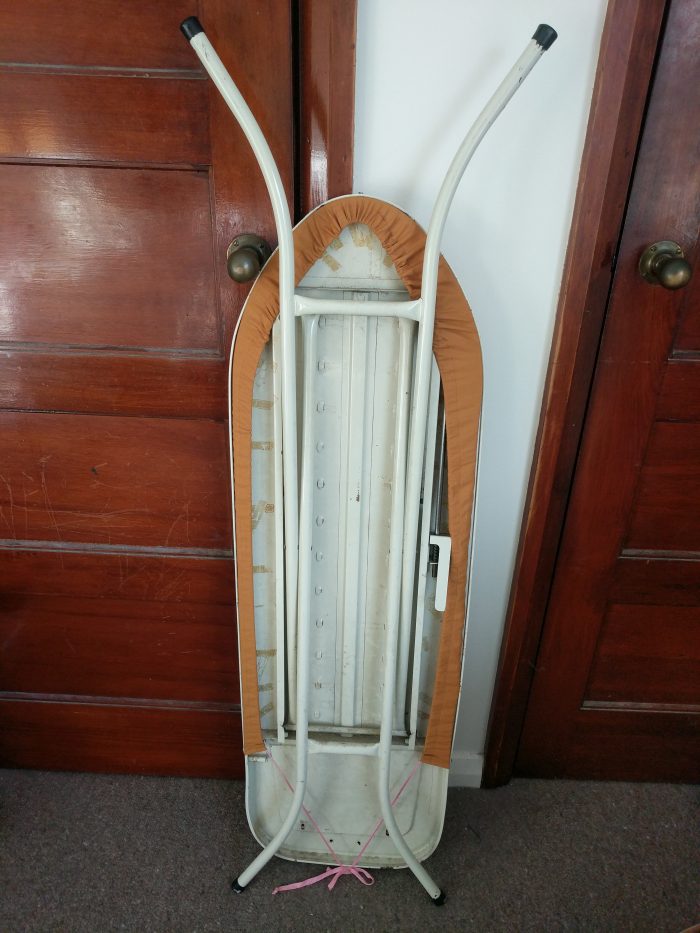
Then, lurking beneath the board, I pulled on the two ends of the bias binding. I was originally intending to tie the ends together under the board level with the square end of the cover, but this resulted in unpleasant gatherings. So I made use of two mysterious little hooky things at the end of the iron rest, and, well…
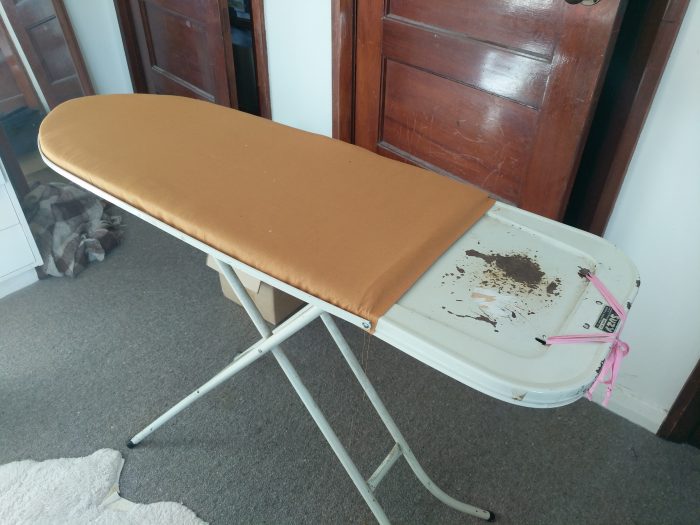
The bias binding was not intended to be seen, which is why it is pink. I would like to change the colour, and no doubt I shall. In another seven years or so. In the meantime, the new cover works. It is, admittedly, not perfect. For one thing, the blanket layers can bulge a bit if you iron too persistently in one direction, which I suspect indicates that I should have cut them big enough to go over the edge and be sandwiched by the metal band. But it works, and I’m going to call that a job well done.
And for those of you who like to see behind the scenes, here’s what it looks like beneath:
A trifle uneven, but note the lack of loose flappy corners to get in the way. As Portia said in The Merchant of Venice, “there is not one among them but I dote on his very absence.”


Great job! Wonderful colour, and what an interesting journey through the process!
I’ve missed this sort of blog post. (Maybe this is an indication that you had already learned most ordinary things, and only the fascinatingly unusual ones are left to discover)
I’ve missed this sort of blog post too! I suspect the recent lack is due to my creativity going dormant for a while (having Other Things On My Mind), not to any lack of interesting things to learn and do – the world being, as we are informed, so full of a number of things.
And I knew you’d like the colour!
Hello!
This is hilarious and nearly had me snorting hot tea out my nose (not recommended). It has also reinforced that an ironing board would be a significant improvement on the “ironing on the nearest flat & slightly forgiving surface” method currently being employed.
Thank you!
I hear ironing used to be done on blankets laid over the kitchen table. Not something I’ve ever tried, largely because my kitchen table usually has a wide variety of things on it. Flat surfaces attract stuff in this house – sometimes even ironing boards do.
Nice job, great idea. I own a very old ironing board, is there any way to remove the legs? Not sturdy at all.
I’ve no idea, sorry. It probably depends on the construction of that particular model of board.