Maybe you can’t afford N-95 masks. Maybe you don’t like sending so many disposable masks to landfill. Maybe you can’t get masks that fit you properly. (I find the blue/white ones always slide about and poke me in the eyes, no matter what contortions I inflict on them beforehand.) Maybe you find fabric masks comfortable but are a bit uncertain about how much protection they’re really providing.
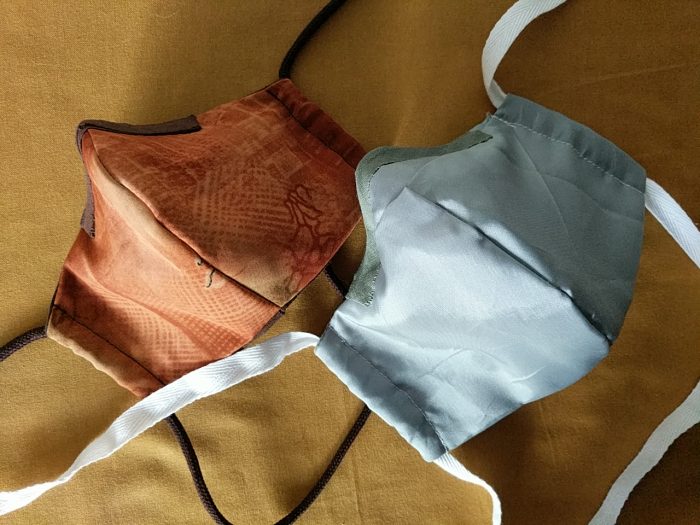
On the grounds that the best mask is the one you wear, and which actually fits well enough to form a barrier between your breath and everyone else’s, I have been wearing reusable homemade fabric masks. But these are not your ordinary fabric masks! No, these leap tall buildings in a…sorry, turned over two pages at once. These are WHO-style triple-layer fabric masks!
There are, it turns out, two secrets to getting a mask that works and wears comfortably, whether you make it or buy it. The first secret is to get the right shape of mask. For example, the ones I make for the Caped Gooseberry have a special nose-piece to avoid glasses getting fogged. And the ones I make for myself are child-sized, because it turns out I have a child-sized face, which is why my whole head was being swallowed in a single gulp by your average standard masks. (We’ll get to the second secret soon.)
The good news is that if you have a mask pattern you like, you can still use it to make a mask that’s a bit more beefy in the protection area. For myself, I use this pattern from the Spruce, and for the Caped Gooseberry I use this one from Made By Barb – with certain alterations.
To make one of these nifty triple-barrelled masks, in addition to the pattern you will need the following:
Some absorbent fabric (e.g. cotton; avoid anything loosely woven)
Some interfacing (sew-in is more pleasant to wear than iron-on)
Some non-absorbent synthetic fabric (e.g. lining fabric, polyester satin…but check you can breathe through it. Also check you don’t hate the colour, as this will be the visible layer.)
Some binding
Some copper wire or an aluminium nose-piece
Some cotton tape or a bootlace (something grippy, not slippy)
…and the usual sewing accoutrements such as scissors, thread, pins, and sewing technology of your choice. (I do most of the sewing with a machine, and the finishing by needle.)
The first step is the cutting out. Regardless of what your pattern says, cut each pattern piece in every fabric.
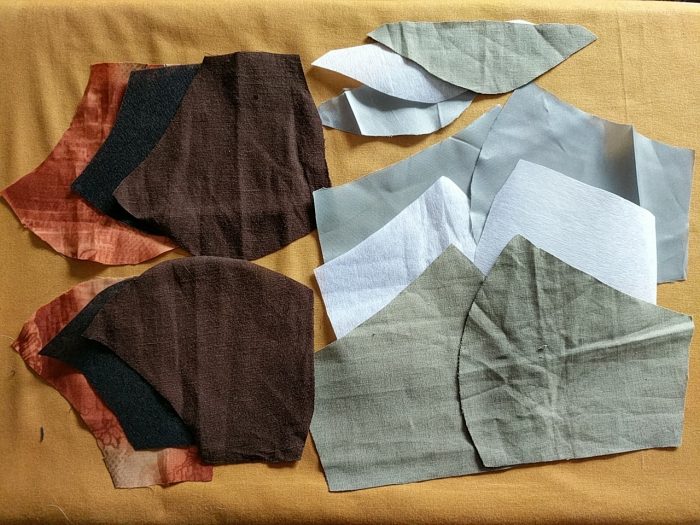
For my mask, there are two mask pieces of outer, two of lining, and two of interfacing. (Important to make these mirror images of each other. Except the interfacing. Interfacing don’t care, unless of course you’re using iron-on.) As you can probably see, the interfacing is cut a bit shorter than the other pieces, on the grounds that the channel for the ties doesn’t need that much protection.
For the glasses-wearing mask, there should also be one each of the nose piece, though there I have altered the pattern to half plus seam allowance, as you can see. Six layers is probably overdoing it. No point keeping your glasses unfogged if you can’t see past the mass of mask towering over the bridge of your nose.
Since the outer fabric is usually something slippery, I tend to tack (baste) each piece to its corresponding interfacing piece, making sure the side I want on the outside of the mask isn’t face to face with the interfacing. Then I treat them as a single “outer” layer, with the outer fabric as the “right side” and the interfacing as the “wrong side”. (Having the knot on the “right side” makes it easier to remove the tacking later.) Iron-on interfacing should not be ironed on to the outer fabric unless you are quite certain of how it responds to heat.
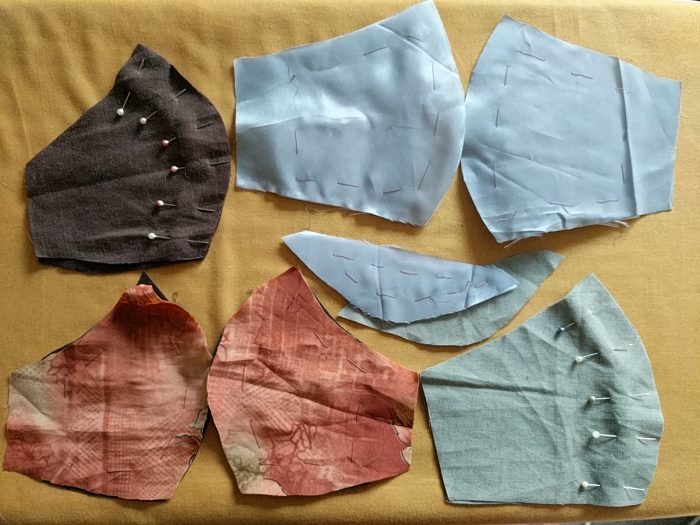
Sew the lining pieces together, right sides together. Do the same for the outer pieces. For the simple two-piece mask, it’s pretty straightforward from here. Put the right side of the lining against the right side of the outer piece, pin, and sew along the top and bottom. Remove pins, and turn your freaky-shaped little tube the right way out. Then you can fold the raw ends of each side into the tube, and fold the whole side in to form a channel for the tie.
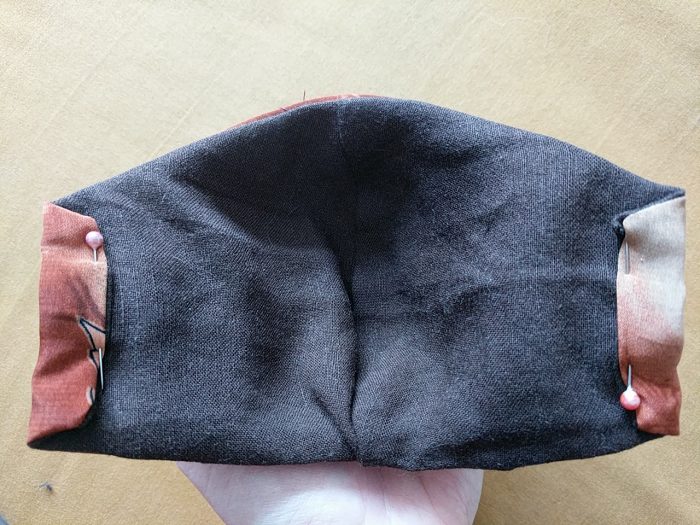
Sew down your two little channels, making sure they’re broad enough for whatever you’re planning to thread through there. Nearly finished! Now you just need to attach a nose wire.
The wire is the second secret for a working, well-wearing mask. If you want a mask that fits to your face and STAYS THERE, you need a wire with a bit more oomph than the sort of thing you might use to close a bread-bag. The Caped Gooseberry uses heavy copper wire; I’ve had success with a length of lighter copper wiring stripped of its insulation and folded to length. (Make sure the wire is not connected to anything before trying this at home.) I’ve also tried the stick-on aluminium strips (0.5mm thick) and found they work for me, though not the Caped Gooseberry.
Whatever you pick, you need enough flex in it that it bends to your face instead of your face bending to it, and enough firmness that the mask doesn’t sag away from your face. If there’s one thing I can’t be having with, it’s a mask that wriggles about on the face. Number of things I want wriggling on my face: 0.
This is also why I eschew elastic. Elastic just doesn’t last the distance, and these masks do. Instead, I thread a bootlace or length of cotton tape through the side channels, from bottom to top on both sides. The loop goes around the back of your neck, and the ties – fully adjustable! – tie atop your head. This also spares your ears.
For copper wires, I make a channel from bias binding that the wire can be threaded into (and removed from for laundering). For the “aluminium deformable nose strips” – what a name! – I stick the strip to a piece of bias binding, tuck in the ends, and sew that in the same place.
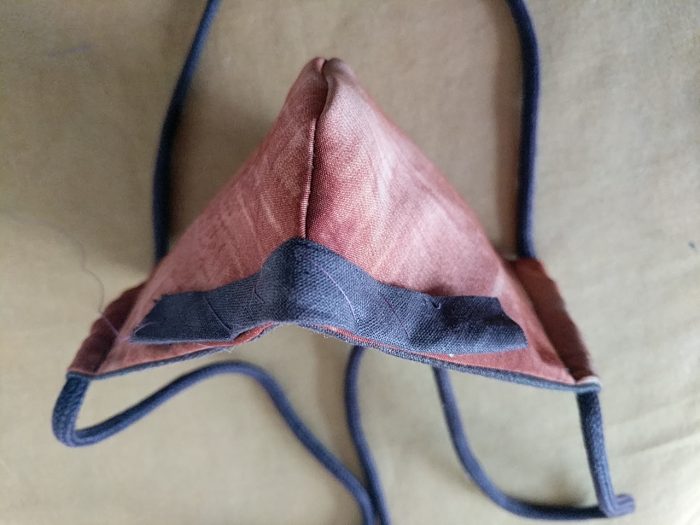
The mask for wearing with glasses is a bit more complicated. But only a bit! Having sewn the two inners and the two outers together, you have one more step before pinning them into a tube. The nose piece needs to be in there, and it needs to be inside the tube when sewn, so as to be on the outside when turned right side out. The raw edge should go along the raw upper edge of the mask pieces, inner fabric facing inner and outer fabric facing outer. Tacking can be very helpful here, just make sure it doesn’t pull loose.
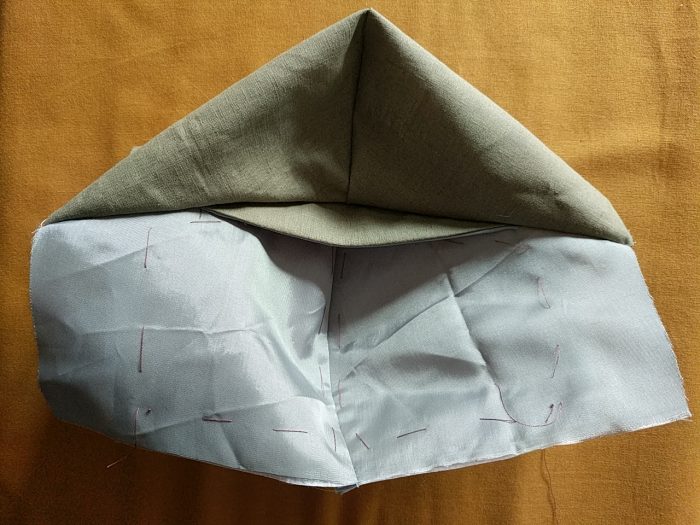
Once that’s done, it’s business as usual – finish the tube, turn it, fold in the raw ends, pin to make the channels, sew them down, and put in your preferred arrangement of bias binding for the nose wire or strip. Add your bootlace or cotton tape, and there you have it! A mask worthy of a superhero who can leap tall buildings in a single bound. Or for those many unsung souls who take that little extra trouble every day to help keep others safe.
These are washable, reusable, and I am happy to say that the Caped Gooseberry (who is even more punctilious than I about mask-wearing in unventilated public spaces) has not caught COVID-19 even once. Not even when I had it in the same two-bed one-bath 100m2 house. Yes, that’s only one data point, but it’s a data point that means a lot to me.
I hope this is of use to you and yours. Stay safe, be kind, and feel free to ask as many questions as you like.
Please note: this post and its pictures are published under a Creative Commons CC BY-SA license. You are free to copy and reuse and transform this content, providing that you credit the original author (i.e. Deborah Makarios) and share under a similar license.
Please also note: the patterns I linked to are not my intellectual property, and have been made available online through the generosity of their designers. Please check with them regarding any restrictions they have on uses of their work.