
This month, buttons and hoops!
I’ve been sewing on buttons for years, and I’ve finally started to do it properly. I always used to just pinion the button to the garment without mercy, but then a mercilessly pinioned button found itself unable to cope with the strain and popped off. I’m not going soft on buttons, I just object to sewing the same button on twice. I’ve got better things to do with my time.

Ideally, when sewing on a button – a holed, non-shank button – one uses what this article describes as a spacer: a needle, pin, toothpick etc which creates a bit of leeway in the threads holding Button A to Garment B.
The spacer is removed once the button is well and truly attached, and the sewing thread is then wrapped around the leeway under the button to create a sort of thread shank, thus allowing space for the fabric around the buttonhole to squeeze in between button and garment.
Due to being rather foggy-minded, I failed to properly educate myself before beginning the button reattachment, with the result that I put my spacer (a wool needle) between the button and the garment, which, while workable, is by no means convenient and not recommended. Thus going to prove that you’re never too old – or too experienced – to read the instructions.

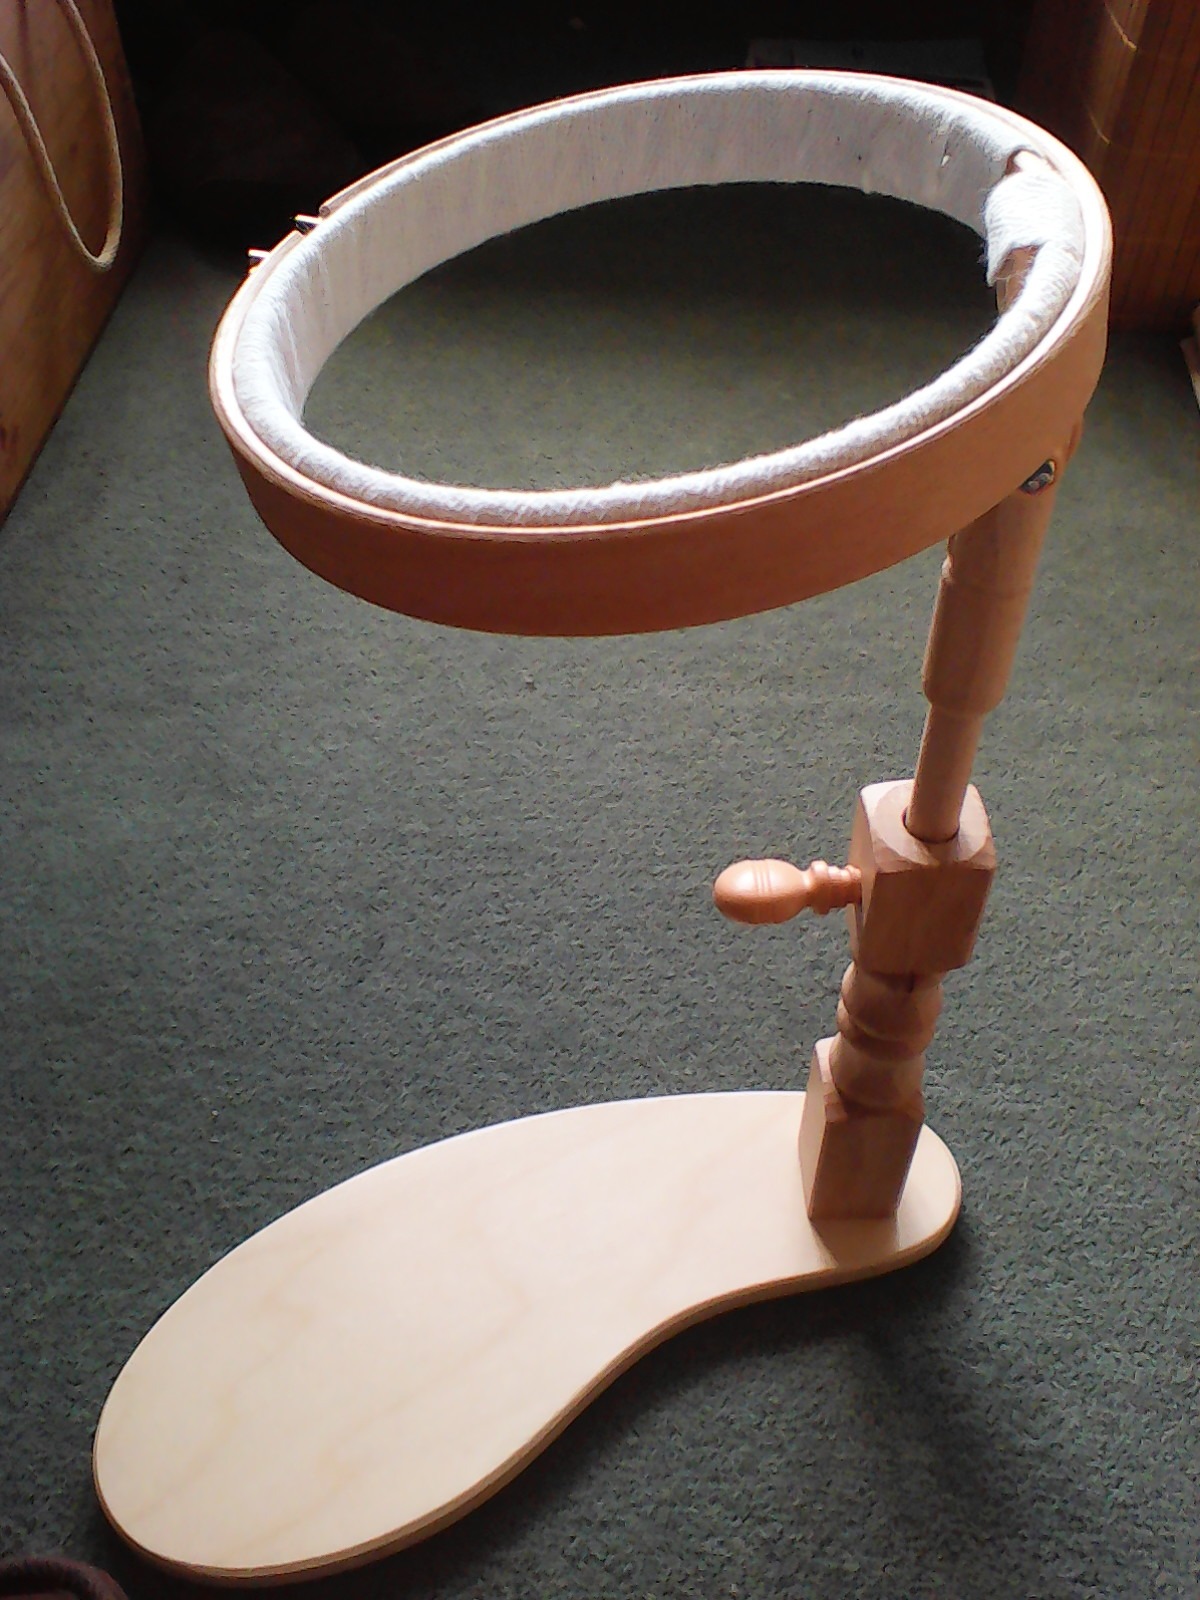
So much for the buttons. More enjoyably: hoops! You may recall a couple of months ago I mentioned I was awaiting the arrival of a seat stand hoop set (try saying that three times quickly). It duly arrived, and I proceeded to put my hoop-wrapping practice into, er, practice.
I used cotton tape for the wrapping. Not, alas, twill tape, because I couldn’t find any at the sewing shop. (I had a dream the other night that the sewing shop and the knitting shop were both closing down. I was on the verge of tears, and tremendously grateful when I woke up.) I bought five metres of the stuff at 3/4in / 19mm wide, and after wrapping the biggest and smallest hoops, I had about one and a half metres left. I haven’t tried wrapping the medium hoop yet, so I don’t know if I’ve got enough.
It is rather fiddly wrapping the tape around the inner hoop, as the inner hoop is the one which has the doohicky attached to it which connects it to the wooden stem via a plastic joint and a metal wingnut (of which more hereafter). Fiddly, but doable. The stem then goes into a hole on the, er, lower stem piece (with a screw for adjusting up and down) and that screws into the flat bit which you sit on.
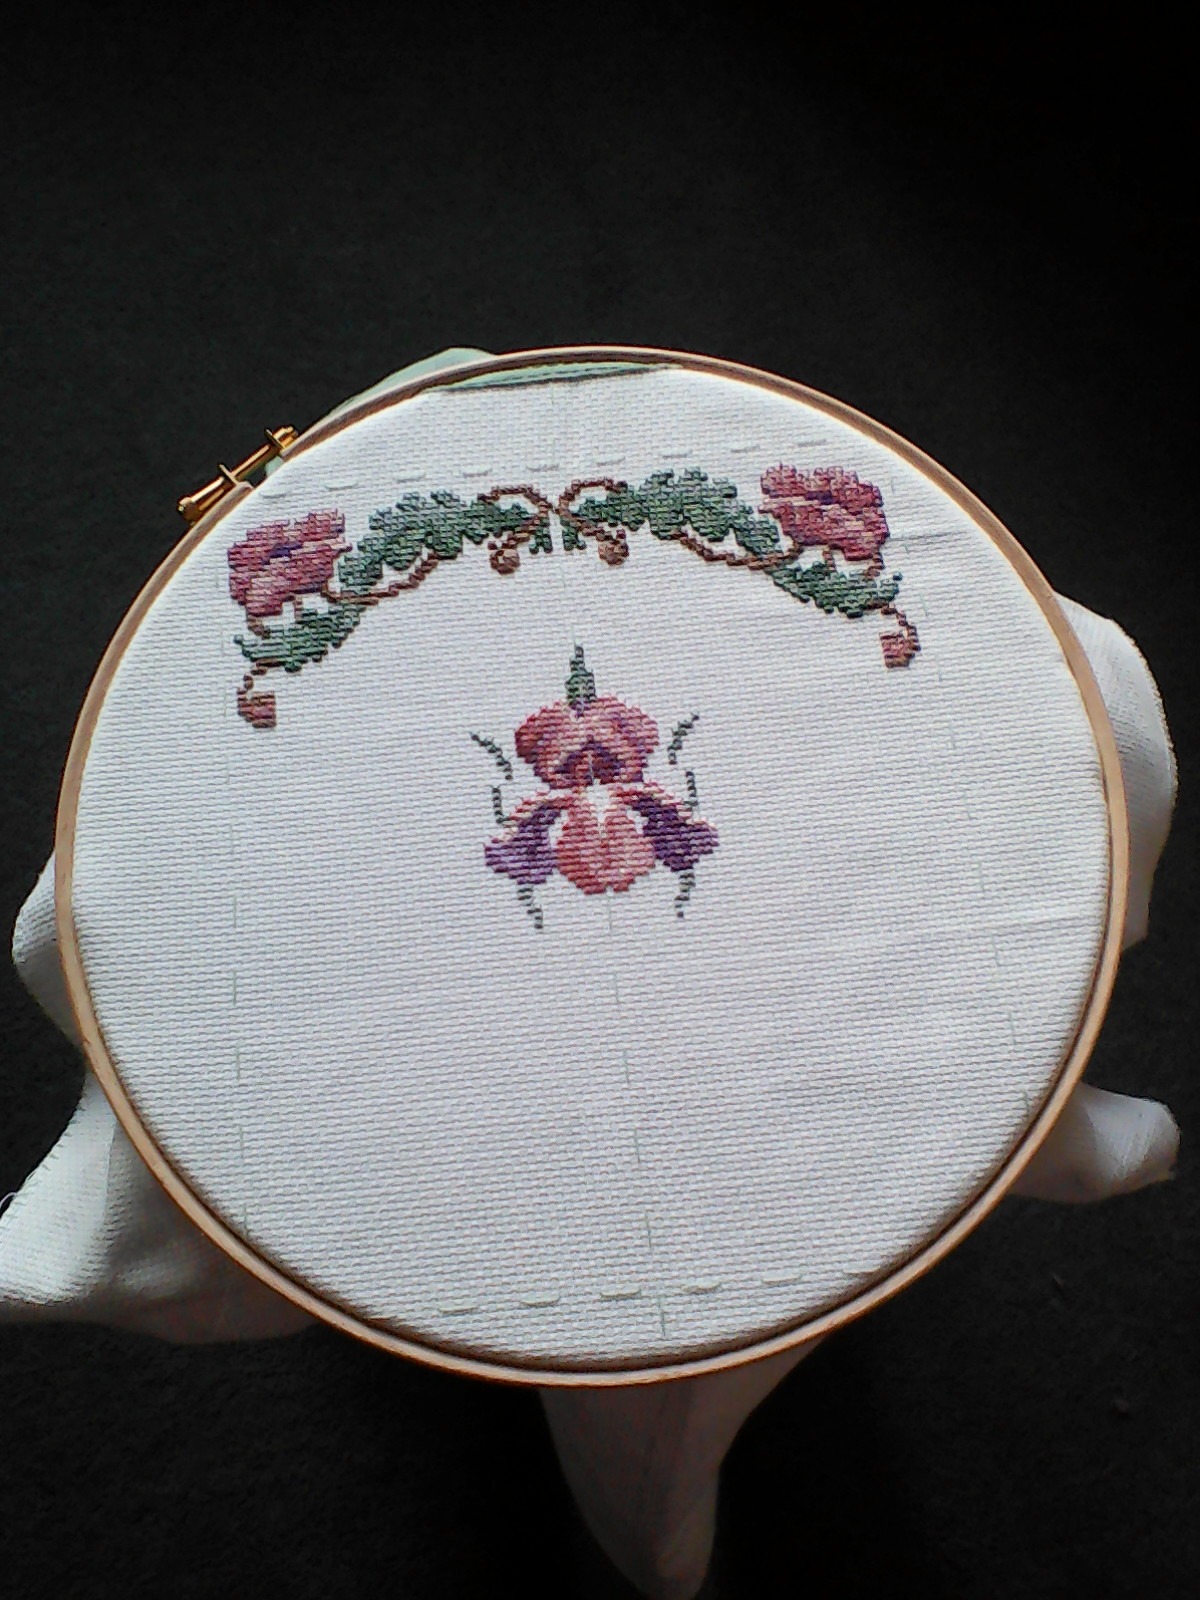
I was expecting to use the smallest hoop (shown above) the most – for practicing tambour work, the original Reason For Purchase – but I haven’t actually been doing much of it. This is possibly because the novel involving tambour work didn’t come out tops in the What Shall I Write Next stakes, which has taken the pressure off a little. I have done a little though, practicing with a bit of net which allows me to see what my underhand is doing, which helps.
Instead, I’ve been doing more work on an old UFO, a cross-stitch samplery thing I started in the mistaken belief that the dimensions provided by the book were correct. I thought it was about 12 by 22cm or thereabouts; It’s actually more like 18cm by 42cm – and that’s just the area of embroidery, never mind the edges. (The largest hoop, 10 inches in diameter, can hold nearly half of it at a time.)
So I’m definitely using the seat stand. But there are pros and cons. The pros include that it’s broadly functional – no more Mariana-in-the-moated-grange back pain, no more flapping about with acres of tensionless fabric – and relatively affordable.
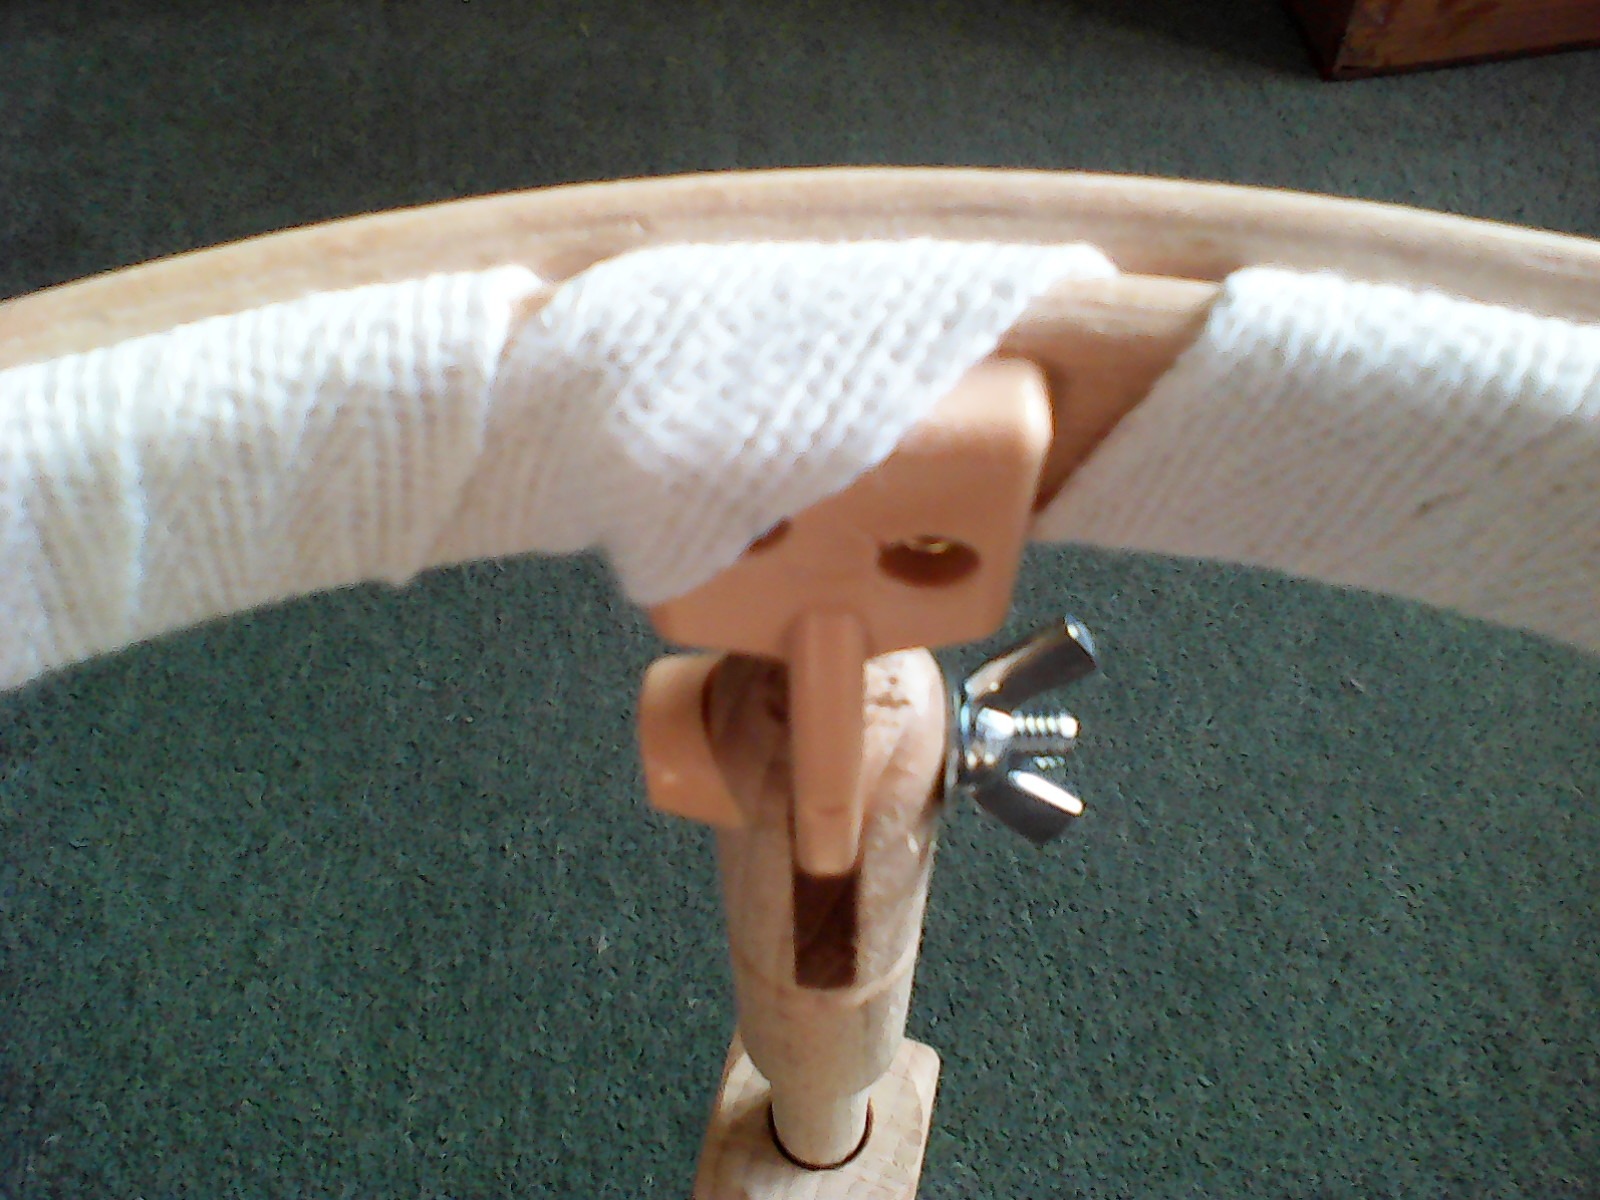
The cons include the splinter I got off the lower stem, despite the box’s claim of “High – Quality Polished wood” (I sanded the hoops smoother before using them), and the wingnut joint where the hoop doohicky joins the stem.
The issue with the wingnut joint is that you’re using a metal wingnut to pin a piece of plastic between two pieces of wood, with another bit of plastic to cup the sides of the wood – on one side, at least. In order to get the hoop to hold firm and not droop, you need to tighten the wingnut quite painfully tight (and I don’t even have arthritis in my hands), and it is then very difficult to loosen if you want to do anything with the back of the work.
I’ve taken to plucking the whole thing, stem and all, out of the lower stem, and putting it upside down on my lap in order to run in threads, etc. Something which fit tighter but had a larger surface to push against than the wing of a small wingnut would be a definite improvement, I feel. And I have my doubts about the practicality of plastic for structural uses. Consider the COD’s definition of the adjective plastic: “capable of being moulded; pliant, supple.”
So that’s been my progress this month: a bit of mending, some embroidery, and a moderate quantity of knitting on the Hat I Knit When I Get Sick, which currently measures about 68cm from brim-fold to needles.
What have your hands been producing this month?