
Yes, it is possible! One can have a skirt with a waist that is easily adjustable to one’s fluctuating circumference, and also with pockets! Huzzah!
I started with Liz Haywood’s free pattern for a three gore wrap skirt. She has a variety of options as far as gores go, but I went with three, because why sew more seams than I had to? I did make a couple of changes, however. For one, I didn’t bother about a buttonhole to thread the waist ties through. I figured I could just overlap them and live with the minor unevenness at hem that would result.
And for another, I added POCKETS! I cut my own pattern piece from a sheet of A4, basing the size of the angled cut on the pocket bag of a favourite dress. Please note: when actually cutting out the pieces, I decided this was too small and added about five centimetres to the bottom for one pair of pocket pieces. Both pockets are fully functional but I prefer the larger one.
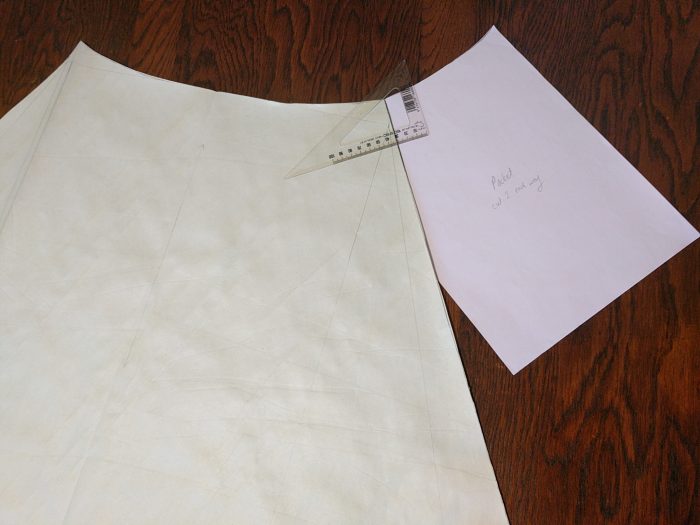
So basically there are only two pattern pieces: the pocket (cut two mirrored pairs) and the skirt (cut one full for the back, and a mirrored pair with one side of the flare folded in for the two fronts). The waistband is just a very long strip (or two). I made mine twice the width of the fabric, if I recall correctly – about 3m total, and about four times the width I wanted for the finished waistband.
You sew the pocket pieces to each angled side, then incorporate them into the seam that joins the skirt pieces. Which is to say, you sew the pocket piece to a skirt piece (right sides together), then when they’re laid faces to faces with another pair of joined pieces, you sew a seam which starts at the unattached top corner of the pocket, goes around the pocket, and then down the side seam of the skirt.
It is, I bear witness, possible to finish all these seams with a flat-felled seam. But I do not say it is wise; nor does it necessarily result in the most flat-lying joins. But it is possible, particularly if you are finishing the seam by hand, and it does result in a durable seam. Think carefully about which side you fell to, is my advice. Next time I might try binding the pocket edges, or even the whole seam.
Once the side pieces are joined to the back piece, with the pockets being formed as these seams are made, you are most of the way there – assuming you are finishing the seams as you go. All that remains is to attach the waistband. I had sewed the two pieces end to end, pressed it in half lengthwise, and then pressed each raw edge to the fold. Like a giant piece of bias binding, without the bias.
I snugged this over the top of the skirt and pocket pieces – making sure the pockets were lying against the fronts of the skirt, not the back, not being a contortionist – then pinned and sewed it. Two lines of topstitching – one at the lower edge to secure the skirt and waistband together, and the other at the upper edge to give visual balance and make the waistband a bit more sturdy.
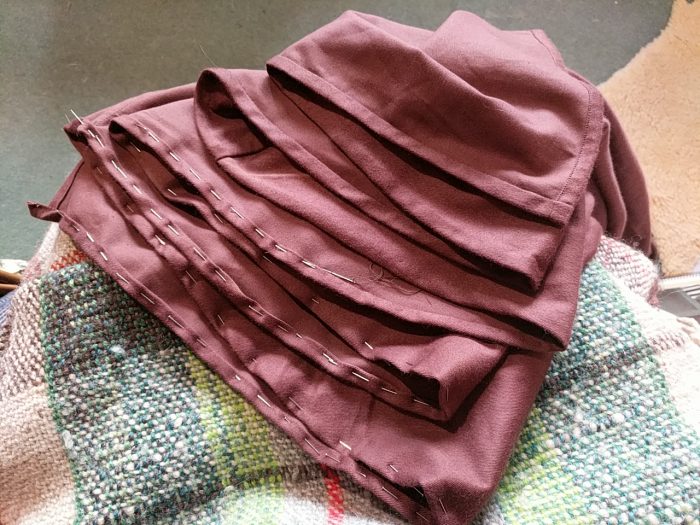
Then there’s nothing left to do but hem. And hem. And hem.
Of course, if you are doing a fancy waistband which is completely level, such as one with an opening to thread the waist ties, then you may wish to hang the skirt to let the bias stretch before hemming it. I hung it a while, but figured there was no point trying to perfect it, since it wouldn’t be even in wear anyway.
The pockets depend from the waistband in order to spread the load of what you put in them. A pocket which simply hangs from the side seam will put a lot of strain on the upper point at which it joins the seam, and if you are a person who likes to carry a sensible number of things about in your pockets, you may find it affects the hang of your garment. Anchoring the pockets to the waistband does away with this problem, by distributing the weight across the whole pocket-width of waistband..
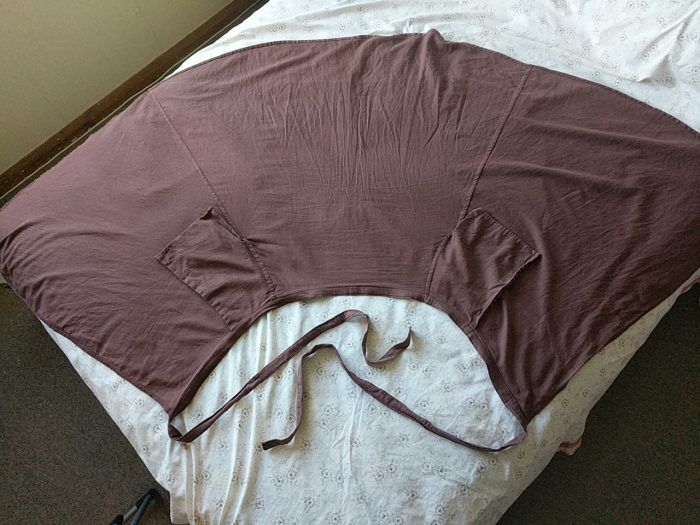
Here’s what the skirt looks like when finished – and, it must be admitted, rather wrinkled from wear. You can see the way the pockets have been laid against the fronts before the raw upper edge was enclosed by the waistband; and also how the waistband is extended at both sides to form the waist ties.
Of course, the great question is: how does it wear? And the answer is, very well. There’s a reason it was all wrinkly and such before I got around to taking photos of it. It has been getting a great deal of wear, and I am enjoying its chief features: capacious pockets, and the ability to change how snug the waistband is at will.
I do find that in the windy Wellington region, the skirt can blow open (revealing a flannel petticoat) but a mildly decorative pin around knee height fixes this. For around the house and so forth, I don’t usually bother – it’s not that windy indoors.
The other great question is how does it look? Pretty good, I think. It’s made from a fabric I bought as a university student (2005, maybe?) and it was only $3 (NZ) per metre then, so it’s not the flashest stuff – fades and coarsens with time – but it’s still a useful practical hard-wearing garment, albeit something of a wearable toile.
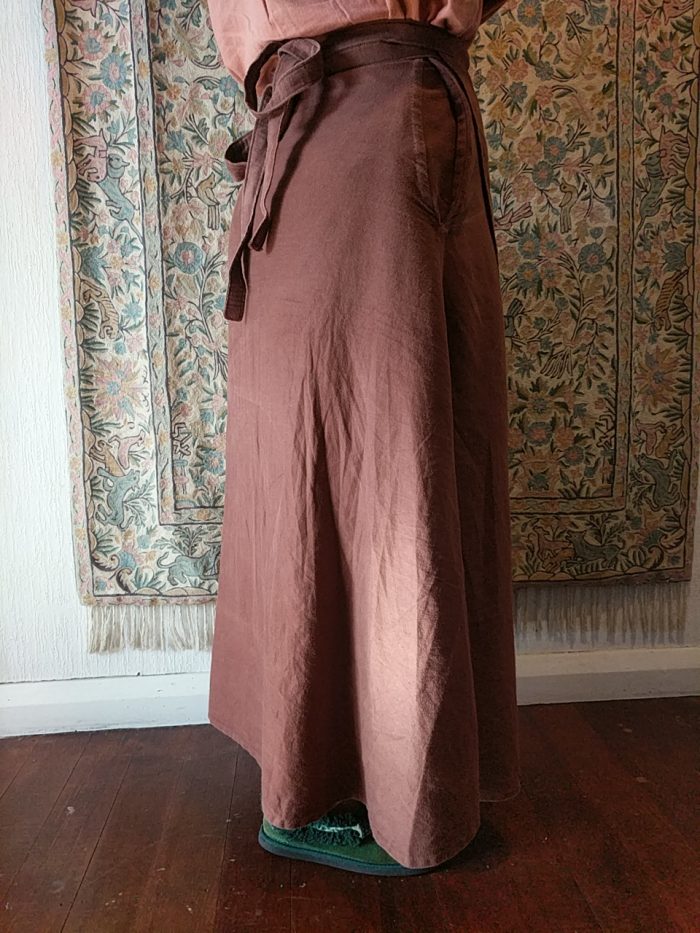
Not perhaps the sort of image you’d see on Instagram, but you get the idea. (I do have a picture from the front, but it’s rather grainy. Mention in the comments if you think you’d find it helpful anyway, and I’ll add it to the post.)
I reckon I’ll make another one. Someday when there are fewer things on my To Make list…
I like your version very much! Great pockets – something which was missing from the original pattern.
Thanks!!