Upskilly & Stuff 2: The Apron

Rectangle, rectangle, string, string, string.

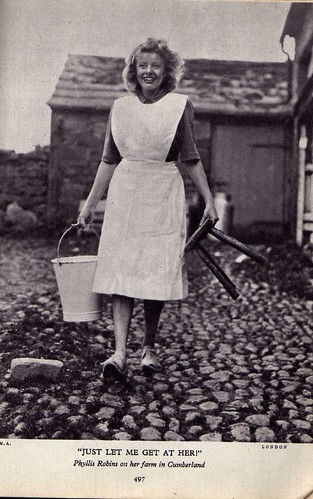
One big rectangle for the bottom part; one smaller rectangle (optional) for the upper part; and three ties: one to go round your neck (unless you opted out of the upper part or wish to pin the bib on in the old-school manner) and two to fasten the whole shebang around your waist.  1-2 rectangles + 2-3 strings = apron.

Tablier pour hommes sans poche bavette bretonne de chef

I actually cheated a bit: I cut the top part and the bottom part (bib and, er, skirt?) in one – a bit wasteful of fabric, but it worked for the piece I had.  Piece of fabric, bias binding for ties, and I was good to go – or was I?

The bias binding was, frankly, the colour of empty sausage casings; the fabric was bright white. Two problems there: one, they don’t go; and two, white is not a good colour for an apron unless you like to spend a lot of time soaking things in stain remover.

Solution: the left-over packet of dye from the triangle dress. Since the uncut fabric was too heavy (i.e. would have resulted in a lighter colour) I cut out the apron shape first, and then stay-stitched the raw edges (a line of stitches close to the edge, to control fraying & distortion), before flinging it, along with the bias binding, into the dye bath.

Observe the line of white stay-stitching.

Learning moment: bias binding, be it never so starchy, will lose its shape the minute you get it wet, and become little more than a tragic draggle. Incidentally, I was unsure to begin with whether the bias binding was natural fibre or something which wouldn’t take the dye. So I snipped a little bit off and set it on fire. General rule of thumb: if it burns, it’s dyeable. If it melts, you’re wasting your time, because a) it won’t dye and b) it’ll make a rotten apron. (Please observe due caution and common sense when setting things on fire.)

Once the dyeing was completed and the materials had dried (hanging on the line for a night, which tells you how hot it’s been here lately) I ironed them. Then I pinned one end of the bias binding (folded double) to one end of the top, and figured out how much I’d need for the neck band. (Never forget to add seam allowances.)

I cut the remaining piece in half for the ties, pinned the right sides of each piece together, sewed them into tubes and turned them right side out again. (I could have whipped the two edges together if it had stayed in the classic bias binding shape, but alas, it was not to be. Perhaps I should have staystitched that as well.) A bodkin can be useful for turning the tube (I used the safety-pin approach) but make sure that this is a sewing bodkin, and not a dagger, please!

Fairbanks Robin Hood giving Marian a dagger
Maid Marian wonders how to tell Robin he got the wrong kind of bodkin.
Then – you guessed it! – press ’em flat. Then back to the pinning: pinning a ‘hem’ like the one I used on the kerchief around the raw edges of the apron piece (thus concealing the stay-stitching, which failed to dye), and attaching the tapes in the right places. My piece of fabric was already hemmed top and bottom, so I had to figure out a way to attach the neck tape which wasn’t built into the hem. (I basically just gave the hem another fold with the neck tape tucked into it.)

Then the sewing! This went pretty well until I got to a corner where two sets of double-fold hem and a tape met. The fabric I’m using is something like a heavy canvas or denim, and it makes for some chunky folds. Had I thought of this earlier, I could have taken the sewing advice I saw once: put it on a piece of wood and flatten it with a hammer. But I managed to pass through the edge, and went back to sew the rest firmly in place afterward by hand. Also by hand (because I forgot at the make-a-tube stage): sewing the free ends of the waist tapes closed.

The exoskeleton models the apron, having just enough neck for it to work.

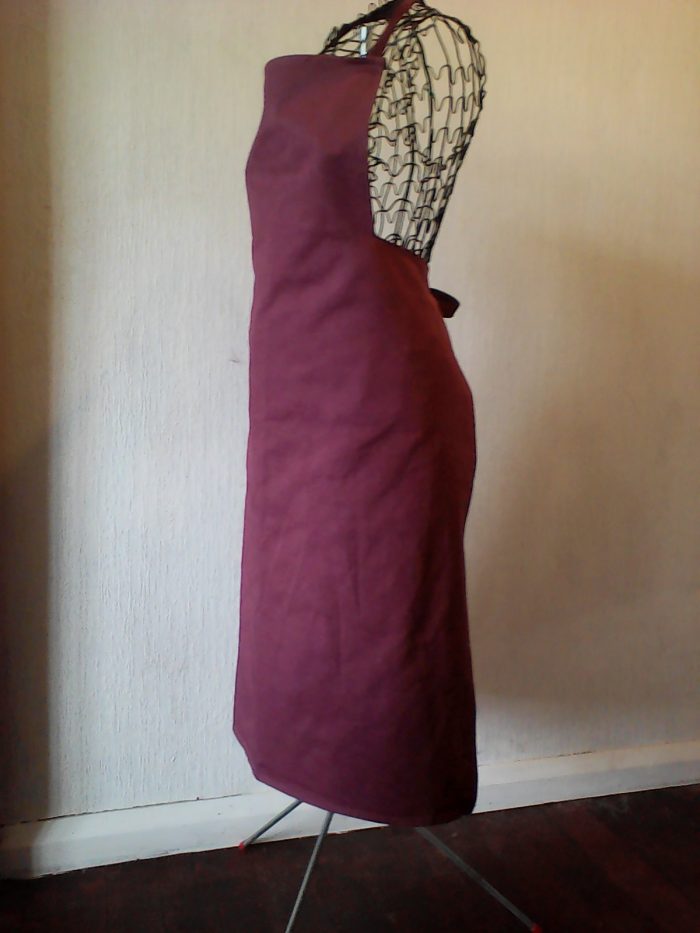
Ta da! It is done, finished, complete. As far as I can see, it has only two issues: the front gapes a bit (still, it’s an apron, not a bib) and it’s kind of… pink. It remains to be seen whether I find it too pink to wear or not.

But, whether I keep it or not, I’ve practiced measuring, cutting, hemming, messing about with bias binding and attaching tapes.

Next month: a simple skirt or slip!


Nanny Butler and the Note of Originality

It came as something of a shock that Nanny Butler was wearing trousers.

“Wouldn’t a black dress, with a nice, frilly apron be better?” suggested Mrs Dearly – rather nervously, because Nanny Butler had never been her Nanny.

https://upload.wikimedia.org/wikipedia/commons/a/a1/Lucy_Stone_in_bloomers.jpg
“You can’t be a butler without trousers,” said Nanny Butler firmly. “But I’ll get a frilly apron tomorrow. It will add a note of originality.” It did.

Dodie Smith, The Hundred and One Dalmatians

Wardrobe Architect 2: Defining a Core Style

This month, we consider what lies at the core of our style. Themes as opposed to plot or events, to use a bookish metaphor. There are a few questions, and then you distill your answers into key words and images. As always, you can download the worksheet (and read the original post & comments) on the Colette site.
Wholesome Milkmaid in 1945 (Phyllis Robins)
How do you feel in your favourite clothes? I think my favourite dress, strangely enough, is one of the plainest: brown, with a faint bleach stain at bench height. But wearing it, I feel capable, adult, set up and ready to go, prepared for everything – practical. (It may help that I like the things I wear with it: my most colourful kerchief and a harmonizing belt.)

How do you feel in not-right clothes? Itchy, uncoordinated (in colour not movement), over-exposed or shapeless; constricted – either in movement or in midsection.

Who are your style icons – what appeals? This is always a difficult one for me, because so seldom do I see anyone who dresses the way I’d like to. Pretty well never, in fact. The closest? Jane Eyre comes to mind, weirdly enough. A small, neat wardrobe, with one or two items reserved for special occasions (but I’d rather not have them all in black or grey!).
The Governess by Richard Redgrave
And then perhaps Andrea Grinberg for headwear, though her wraps are sometimes larger and more elaborate than I would feel me-ish in. Occasional items worn by the Duchess of Cambridge – although mostly eveningwear, as that seems to be the only time fashion permits the longer length I like. Other than that I mostly see things I like in historical and fantasy movies.  (Who’s with me?)

Actually, the 1840s seem to have been a reasonably reasonable time in clothing, compared to many eras: dresses mostly woman-shaped and the skirts not excessively immense. Not keen on the evening drop-shoulder, though: it’s bad for duelling (and most other things you might want to do).

What are some words for styles that aren’t quite you, though you like them?
I’m not sure of the reason behind this question, since “not quite you” isn’t what you really want to be focussing on. I suppose the ladylike suited look of the 1930s appeals, but isn’t quite me. Swashbuckling, Pre-Raphaelite, early medieval… Nice places to visit but I wouldn’t want to live there.

Brown lapin over green woolList about 15 words from last week’s answers.
long, fitted, quality, devotee, nonconformist, Melanesian, modesty, historical, kerchief, freedom [of movement], skirts, pockets, layers, waist, privacy.

Add some from this week’s answers. Neat, plain, capable, practical.

Boil down to 3-5 words.
Neat, historical, practical, quality, devotee.

And then – this is the fun bit – you go looking for 15-20 images that express these words for you. Not just images of clothing, but images generally which sum up the feel you’re looking for. You can do this online or old-school (back when cut and paste actually involved scissors and glue). I prefer old-school, but since we’re online, here’s one of mine in digital format.

Helen Allingham - Drying Clothes
Neat, historical, practical.
What words would you use to evoke your core style?